
During the holiday season, my family entertains often. For Christmas Eve and Christmas dinner, we spend all day preparing homemade food and decorating the dining room. I've sewed this Christmas and Winter table runner numerous times and have enjoyed the results. It only takes about 30 minutes to sew (an hour if you add decorative features). I hope you enjoy sewing your table runner and be sure to tag us in a finished photo on social media!

If you don’t want to embellish your table runner with decorative stitches and cording, skip all steps labeled "Decorative Version."
Required Supplies:
1. At least 12 6 1/2" x 15 1/2" strips of fabric for a 5ft table. Add more strips to fit larger tables.
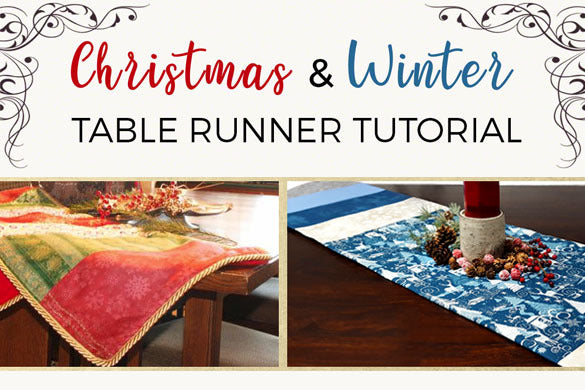
Choose a fabric combination from our Christmas Sewing Catalog. To make our Winter Table Runner, we used Option B and Winter Friends Cream Snowflakes from Option A.

A: Winter's Friends Plaid Fabric, Winter's Friends Green Snowflakes Fabric, Winter's Friends Cream Snowflakes Fabric, Winter's Friends Woodland Fabric Panels
B: Moda Grunge Prussian Blue, Moda Classic Grey Marble Swirls, Moda Bella Solid Thirties Blue, Merry Christmas Basics Blue
C: Winter Wonderland Candy Cane Snow Flakes, Moda Classic Red Marble Stars, Moda Classic Emerald Small Dottie, Robert Kaufman Christmas Doves
D: Micro Polka Green Dots, Metallic Red Snowflakes Fabric, Moda Classic Tan Marble Stars, Tis the Season Patchwork Christmas Fabric
2. At least 2 yards of a backing fabric for a 5 ft table. Add more length to fit larger tables.
3. At least 2 yards of batting for a 5 ft table. Add more length to fit larger tables.
4. Basic sewing supplies (ruler, rotary cutter/rotary mat or scissors, Universal Needles, thread).
Additional Required Supplies for Decorative Table Runner:
You will need at least 5 1/2 yards of decorative cording/piping and a Zipper Foot. To add decorative stitches, you will need a Monogramming Foot, decorative thread, and a Topstitching Needle. You may also need a Winged Needle for more complex decorative stitches.
Let's Get Started!
The Runner Top
Measure your table and adjust fabric amount accordingly. I suggest adding two extra strips for every additional foot over 5 feet. So, if your table is 6 feet, you will need 14 strips. If your table is 7 ft, you will need 16 strips. Add additional strips if you want your table runner to drape off the edge of the table.
Decorative: If your table is longer than 5 feet, add 24 inches of cording for each additional foot.
Arrange 12 (or more) 6 ½" by 15 ½" strips into a pattern you like. Sew together using a 1/4" seam allowance. Press seams open. 
Batting And Backing
Cut your backing and batting pieces to be two inches larger than your top piece on all sides.
Baste your batting and backing together using long basting stitches or basting spray. For those not adding decorative trim or decorative stitches, scroll to the Putting It All Together section.
Decorative Version: Sew a 5/8 inch basting stitch along all edges. Install a Monogramming Foot and Topstitching Needle (or Winged Needle). Choose a decorative stitch and use the basting stitch as a guide to sew two parallel lines along the edges. You can sew more lines if you wish.

Decorative: Time to sew the cording! First, determine the right side from the wrong side of the cord.

Install your Zipper Foot and Universal Needle.
Line up the edge of your cording with the edge of the fabric (right sides together). The cord should line up with your basting stitch. Slowly sew as close to the cording as you can, adjusting often.

Snip into the cord tape and curve your corners.

Decorative: The cord end is a little tricky. Try to sew as close as you can and leave a 3-inch tail. Make sure you tape around the end of the cord before you cut to prevent fraying.

Putting It All Together
With right sides together, place your runner top on top of your backing/batting piece. Smooth out any wrinkles and pin starting from the middle and working your way out. We will sew it together like a pillowcase and turn it right sides out.
Sew all sides using a 1/4" seam allowance. Leave an opening large enough to pull the runner right sides out.
Turn your runner right sides out and sew the opening closed. You're finished!
Decorative: To finish your cording, untwist the excess tail length. Tuck the untwisted tails inside the runner, and hand sew the opening closed.


