It's the happiest time of the year, again! Who doesn't love decorating for Christmas? Especially to some classic holiday tunes. This year I wanted to goof around a bit and have fun. I saw this awesome off white lace at the fabric store. I just HAD to have, but it was $25 a yard. Ouch. So, I bought 1/3 a yard and decided to do a small craft with it.
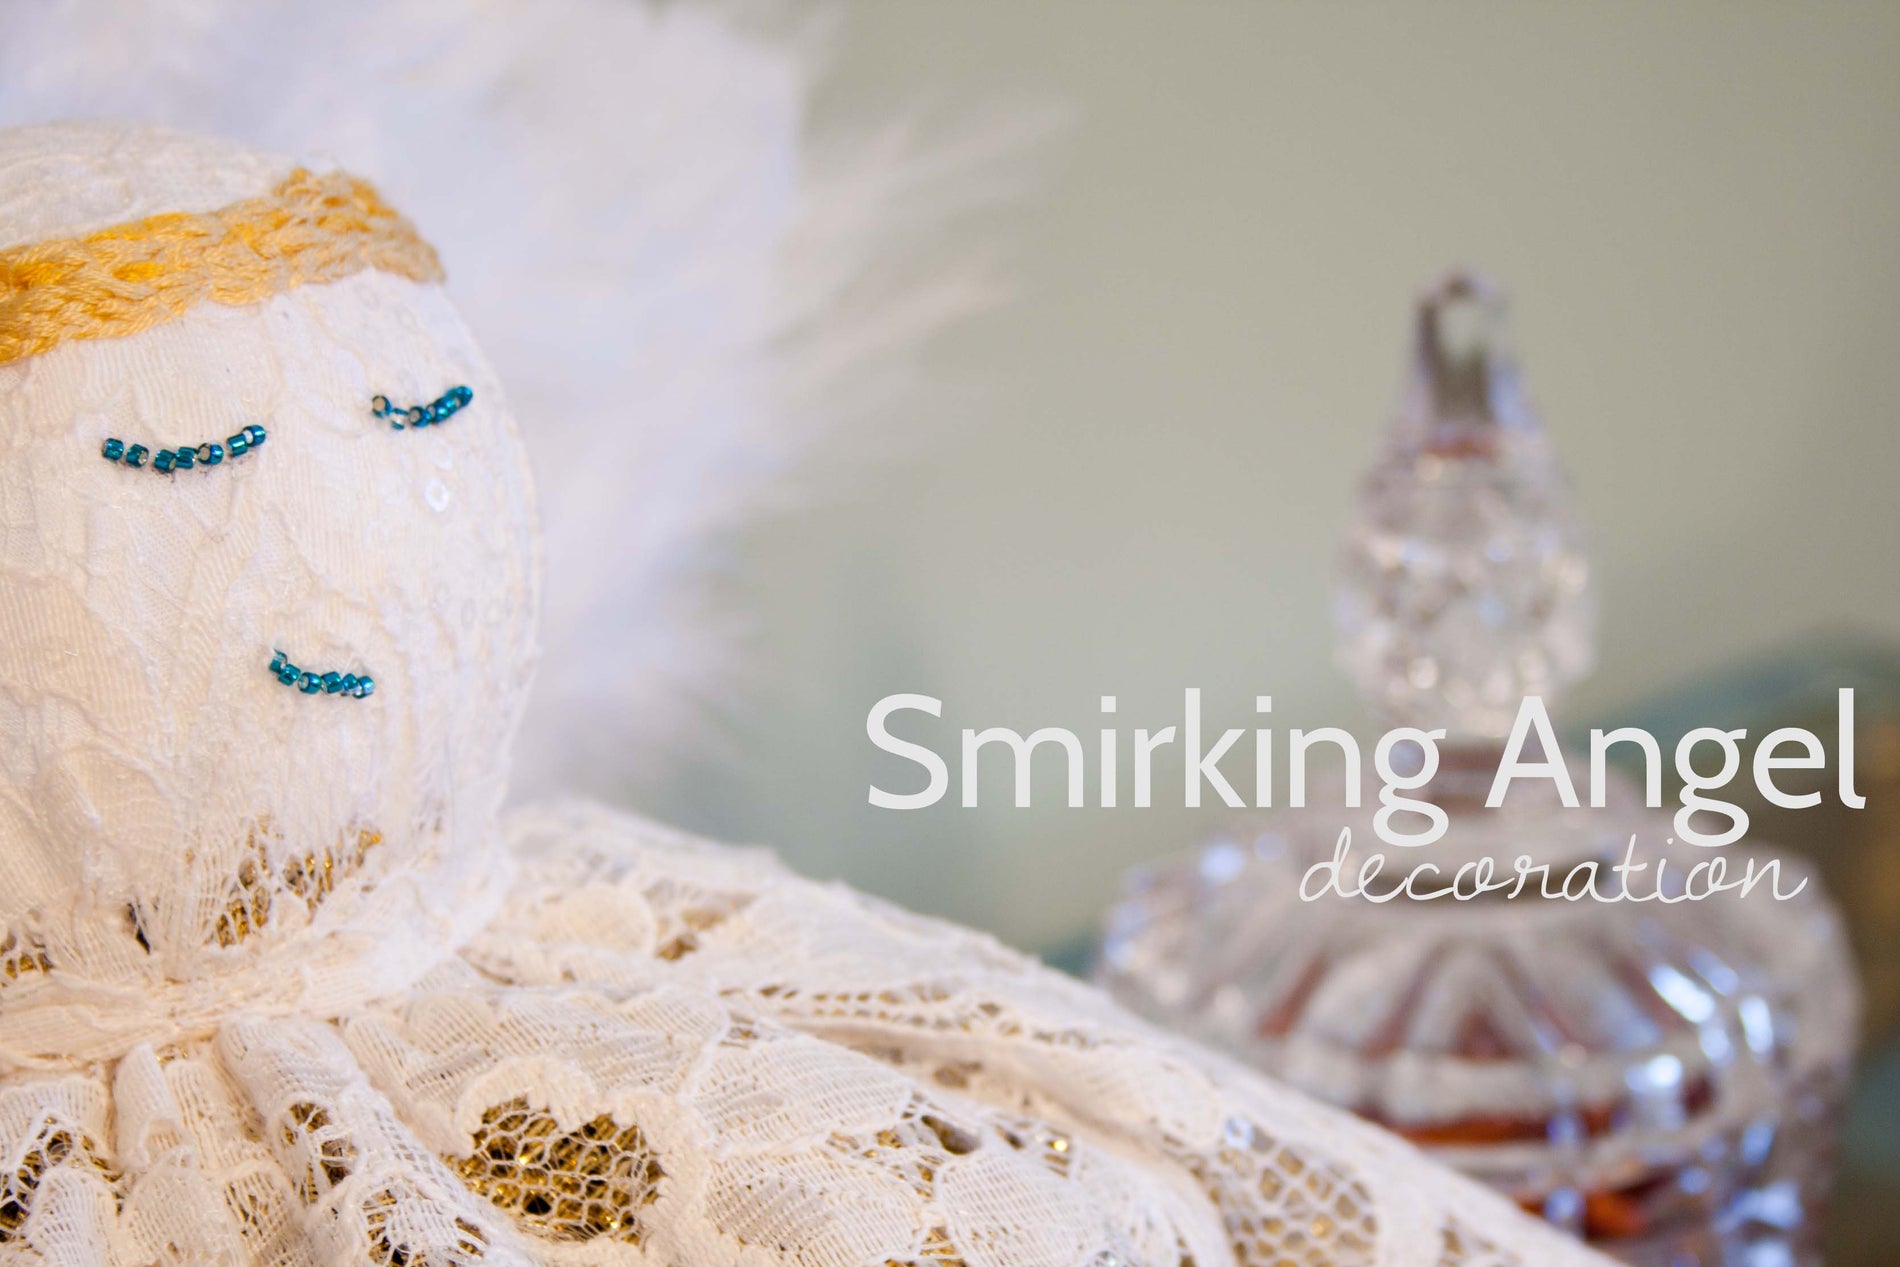
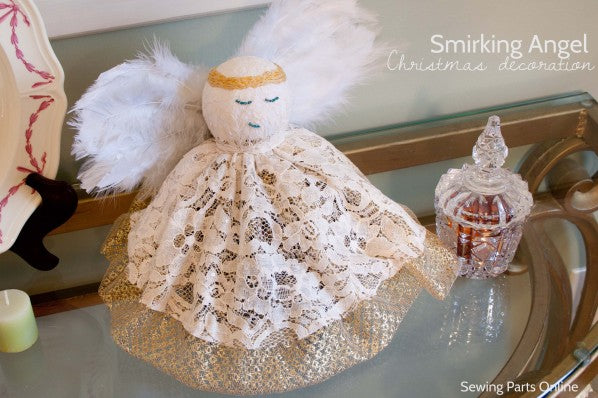
I made a smirking angel. Cheeky little thing.

And appropriately hanging out by the candy jar. Little sneak...
I know this little angel doesn't have any arms...artistic choice? I mean, Venus de Milo doesn't have any arms. Then again, Venus de Milo originally had arms. Not really helping my cause, am I?
The inspiration for this angel comes from my childhood Christmas tree. We use to have these really simple angel ornaments. It was basically just a small wooden ball with red foil over top and a bow to cinch the foil into a dress. Make any sense? Super basic, but I really loved them.
This project can be as easy or detailed as you like. I plan to make smaller ones for my tree that are just like my childhood ornaments, but with lace instead of foil.
Basically, you cut a large muslin circle and an even larger lace circle. My lace circle was 20 inches across. Muslin was about 14.

Ruffle up some super stiff tulle. Originally, I just had one strip of tulle, but I added a second strip the bottom of the first to make my angel stand taller.
Ruffle up some metallic netting. This will resemble a petticoat. This can be cut as a rectangle. Go for about 18 inches long by 36 wide. This way the skirt will have a ton of volume. Turn the hem under an inch to create a 'bubble' hem.
Now that you have the majority of the parts ready, let's start layering the Styrofoam. First wrap the muslin and tie with a rubber band. Then, sew or hot glue the tulle 1/2 inch above the rubber band (on to the muslin covered styrofoan). Now, wrap the metallic mesh around the tulle as many times as you can. Hot glue or sew to the tulle.

Drape the lace on top of the muslin and cinch again with a rubber band. Use a strip of lace to wrap around the rubber band. You definitely want to disguise the ugly rubber. Secure with thread or glue.
To make the halo, simply braid 3 thick strands of gold embroidery floss or yarn. Wrap it around the top position of the 'head' and secure with pins. On the back of the 'head', twirl the ends of the floss/yarn so it resembles a bun and pin. Once it's all pinned, use clear thread to sew it to the lace and muslin. You can also use hot glue if you prefer. Remove the pins when finished.
Use a pencil to draw two semi circles for the eyes, so they appear shut. Sew 7 beads per eye and use an appliqué or beading needle. For the mouth, drawl then bead 'half a grin' below the right eye, so it appears as if the angel is smirking.

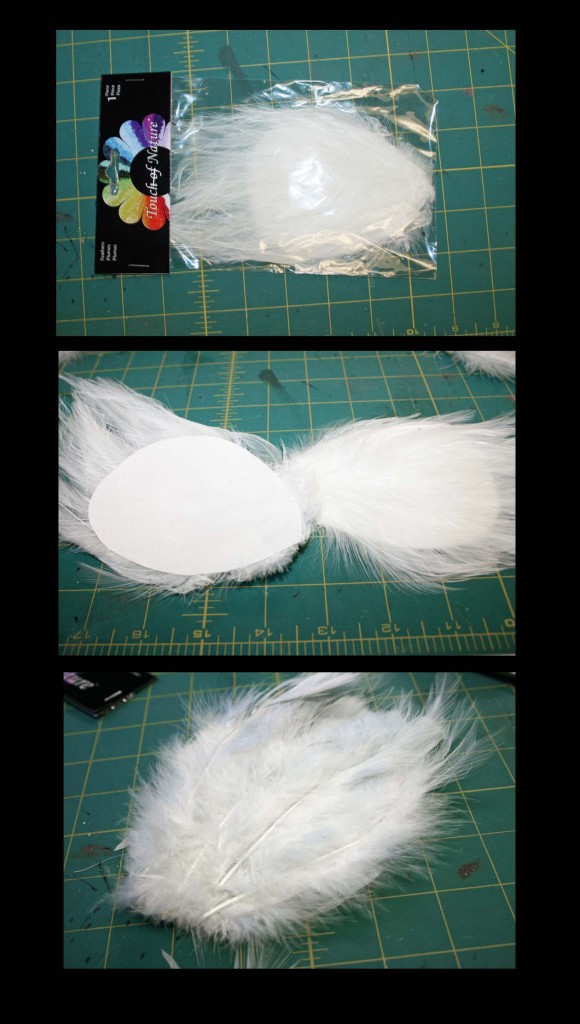
For the wings you'll need to buy two types of feathers: 2 sets that are already glued together (it looks like something you would see on a headband) and a regular bag of loose white feathers. Since the set that's already glued together has a backing, you'll need to glue the loose feathers on top of the backing to hide it. Try to arrange so it looks natural, like you would see on a bird.
Using clear thread, sew the finished wings on the back of the angel. Play around with the positioning until you are satisfied with the placement.


