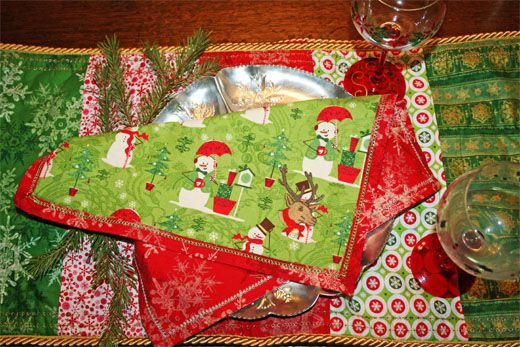

Not only are we reducing our carbon footprint, but we are doing it in style! Cloth napkins are classy and, I feel, are a defining, elegant touch. I feel they add a formal essence to special occasions and give the table a more traditional look. And cheap paper napkins just weren’t working with my china set. To make these napkins, I found a bundle of Christmas fabric pre-cut into fat quarters at Joann’s Fabric store. If you can’t find any fat quarters you like, just have them cut (21 inches) from a bolt you like.
You can do this project two ways: basic or decorative. The simple route is less time consuming, yet still has the holiday flair you want. I suggest using either cotton or linen fabric because they are durable and easy to clean. You want to actually be able to use these as napkins.
Required Supplies (Basic)
1. 2 Fat Quarters of contrasting Fabric for every 1 napkin
2. Universal thread
3. Universal needle
4. Rotary Mat
5. Rotary Cutter
6. Quilting Ruler
7. Scissors
8. Seam Ripper
9. Pins
10. Iron
Required Supplies (Decorative)
1. Embroidery thread
2. Embroidery machine
3. Embroidery Pattern of your liking
4. Monogram Foot
5. Winged needle
6. Stabilizer
7. Basting Spray
Cut all fat quarters into 18in by 18in squares using your Quilting Ruler and rotary mat and cutter.

Stitch a 1 inch basting stitch from edge of fabric on all four sides. Repeat 1/4" an inch from edge of fabric. These are going to be our fold lines

If you are making the decorative version, cut out stabilizer and apply with basting spray to wrong side of top fabric.
Set up your embroidery machine/attachments and select a holiday design. If your machine has the option, you can download additional designs online. I have a Brother, so I went to their website and, using my provided USB cord, plugged my sewing machine into my computer and downloaded a free embroidery design. Here are a few websites I browse for embroidery patterns:
https://www.brother-usa.com/HomeSewing/GetCreative/free-designs.aspx#.TuuPcvKndi8
https://www.embroiderydesigns.com/?gclid=CJbbnoueh60CFQXd4Aodaxcflg
This is what it looks like when I have the design on my machine and ready to be embroidered.

Because this design has 9 steps and uses 5 different colors, I had to refer back to the computer screen to distinguish which color goes with which step. It is best to keep your computer close. I literally set my lap top on a little tray by my machine.
If you don’t currently have all the required colors in embroidery thread, good quality all purpose thread works fine. You will need to use a thread spool or your hand to help feed the thread evenly. On my design, only the red and yellow thread is actual embroidery thread.

Trim off excess stabilizer. Use Basting Spray to adhere contrasting fabrics, wrong sides together. I find it works best to place fabric together, then fold back one side at a time and spray on adhesive.

Iron down your 1 inch fold, then your ¼ inch. Use basting stitch to guide you.

Making mitered corners is a little tricky. Unravel the corner and turn to the opposite side and pinch together.

Basically, you are going to stitch a straight line so that the line and the edge make a triangle.

Trim and turn over to the front. Pin down.

Press. Remove all basting stitches. Install winged needle, monogram foot, and embroidery thread. Using a decorative heirloom stitch, sew on edge where contrasting fabrics meet.

Clean up all stray threads and press.
Now, step back, admire your work and smile. Martha’s got nothing on your home decoration skills!


