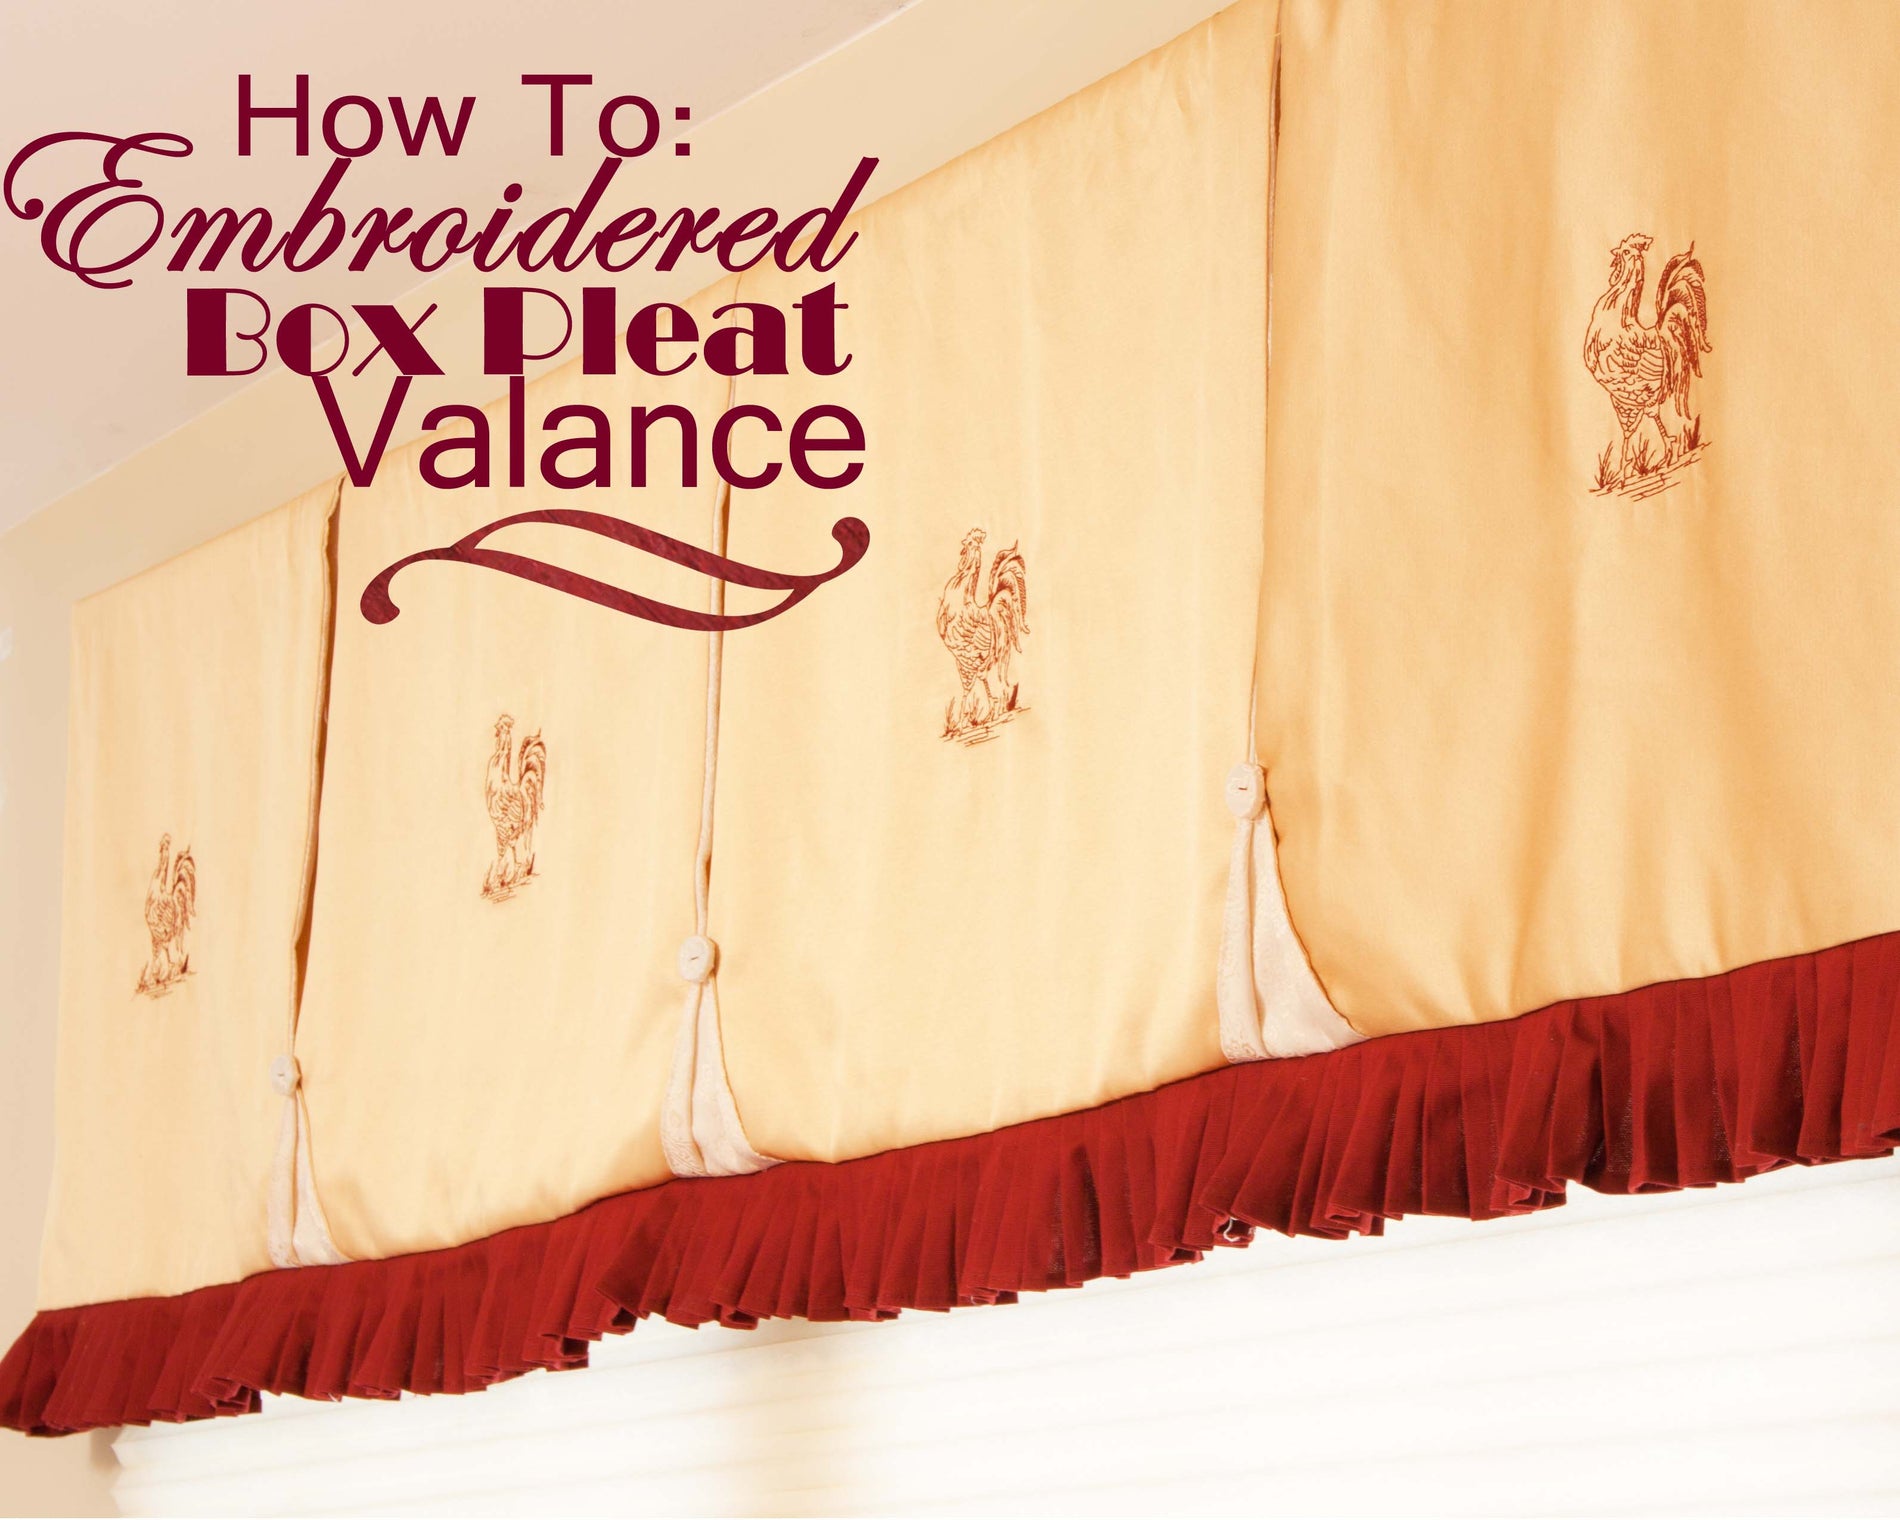
It's amazing how something as simple as curtains can really define a room. Window treatments can make the room feel more elegant or relaxed. They can make a space appear larger and all around more ' together'. Sure, you can get curtains for pretty cheap these days, but as sewists - we can do better! I think I spent under $20 dollars for this valance - and that includes the $6 embroidery design.
I designed this for my Mum. She's big into the "french country" look (hence the rooster). Believe it or not, the biggest challenge was trying to match fabric with her super busy rugs. For french country, you can usually "toile" your way out of any design rut, but not with her rugs. Oh no. So, after many hours googling "french country curtains", I figured my best bet was to keep the fabric simple, but the design detailed. And this is what I came up with:
 I'd like to say this valance was the typical DIY fast and easy, but it is a tab bit time consuming. I'd say you could knock this out in a day if you have that kind of focus and energy, but for the average Jane this will probably take a weekend to finish.
Supplies
1 yard of fabric for valance body (the gold fabric in mine)
1 yard of fabric for pleated skirt (red fabric in mine)
1/2 yard of fabric for box pleat insert (cream fabric in mine)
3 Buttons (they don't have to match in color, just size because they will be covered)
Hot glue Gun
Embroidery Design ( I found my pattern here - Great site for designs, many of which are free!)
Universal Needle for fabric weight and type
Upholstery Hand Sewing Needle
Ruffler Foot (recommended for fast, even pleats. However, hand pleats are fine.)
Iron with steam setting
ALL SEAMS ARE 1/2in UNLESS OTHERWISE NOTED.
Step 1
Pleated Skirt: Cut 4 inch wide stripes 4 times longer than the curtain rod for your window. You can cut multiple strips and just sew them together to make one super long strip. You can hide the seams in the pleats.
Inside Box Pleat: Cut 3 9 x 20 inch rectangles. This is the white fabric on my valance.
Valance Body: Measure the bar of your curtain rod. If you just have the basic white rod (which is what I have), make sure to include the curved corner in your measurement. We want the whole thing covered. Now add 4 inches. For example, my rod measures 76 inches, so I will need 80 inches of fabric. Now, divide that number by 4. You will cut 4 panels of fabric to that width to make the valance body. For me, I cut my rectangles 20 inches wide. (because 80 divided by 4 is 20.) You want your length to be 19 inches. Enough math for one week? Agreed!

Step 2
Hem the bottom and side raw edges of the skirt strip before pleating. Pleat with either your ruffler foot or by hand. I suggest using the 1 setting and 3.0 stitch length. If you are hand pleating, just fold the fabric while you sew. Don't bother with the iron until after the pleats are formed.

Step 3 Find the very center of your valance body panel and mark with chalk. I suggest marking the direction of the embroidery pattern before you start simply to prevent embroidering the pattern in the wrong direction.

Use your basting spray to attach stabilizer to the wrong side of the panels. Sew your embroidery design to all 4 panels.

Step 4
Sew the box pleat insert to the panels. This is where I messed up by not making my inserts slightly longer than the panels. The bottom of the insert should be longer than the panels. This is so you can fold it up later.

Step 5
Pinch the box pleat seams and fold them in to the center of the box pleat insert. Pin down and adjust as needed so that the pleat is equal on both folds.

Step 6
Fold the bottom of the pleat outward like a triangle to expose the box pleat insert. You want to fold the edges up so that the corner of the triangle will match up with the bottom edge of the panels.

Step 7
To cover your buttons with fabric, simply cut a circle larger than the button so that the edges can be folded in and hot glued down.

Step 8
Attach the buttons to the top corner of the triangle. You will need to use a strong needle to punch through the hot glue.

Step 9
With right sides together, attach the skirt to the valance body.

Make sure to keep the ends of the skirt 1/2 inch from the edge of the valance body. When you go to attach the lining, you don't want the skirt to get attached to the sides of the valance.

Step 10
With right sides together, sew the lining to the shell.

Leave a 1 inch opening 1/2 inch from the top of the valance as to pass the curtain rod. One the side of the valance, make sure to leave an opening large enough to turn the fabric sides out. Then, sew that opening closed.

Quick Tip: As any dedicated HGTV fan will tell you, you can make a window appear larger by moving the curtain rod up closer to the ceiling. For example, my Mom's curtain rod was originally installed 2 inches above the window. Instead, we moved it up about 6 inches below the ceiling. Instantly, the entire room looked bigger because the eye was drawn upward. Just something to think about! =)


