Recycle Plastic Bags into Cute Clutch
Who doesn’t love a clutch? Now Mother Nature will too because you can make one out of plastic bags! Since learning to fuse plastic bags, I’m always on the lookout for plastic bags with a great color, pattern, or logo because they make the coolest projects. Fused plastic is so easy to work with! It is easy to make, sew, and looks completely unique every time. Not to mention it is free and an environmentally friendly project. According to earthsource.org, the” average individual uses around 130 plastic bags per year”! And it is said to take 1,000 years for a typical plastic bag to decompose in a landfill. What a waste! Keep bags out of the landfill and in style with this easy to make clutch.

Supplies
•5-6 Plastic Bags with color or designs
•Zipper foot (however, you can get by without one for this project)
•Scissors (for paper, not fabric)
•Marker
•Iron
•Bobby Pins/Paper Clips (not straight pins allowed)
Step 1. Open a window for ventilation.
Cut off the handles and bottom strip of plastic bag. Turn inside out. For thin plastic, fold so you have 8 layers. For thicker plastic bags, fold so you have 4 layers. Sandwich plastic between 2 pieces of parchment paper and iron each side for 30 seconds on medium. You may have to keep turning the plastic over until it is completely fused. Repeat this step for all plastic bags.

Step 2. Cut 3 6 inch by 12inch rectangles; 2 for the outside layer of clutch, 1 for the lining. From the lining, cut 1 3 ½ inch by 12inch strip and 1 4 ½ by 12 inch strips.

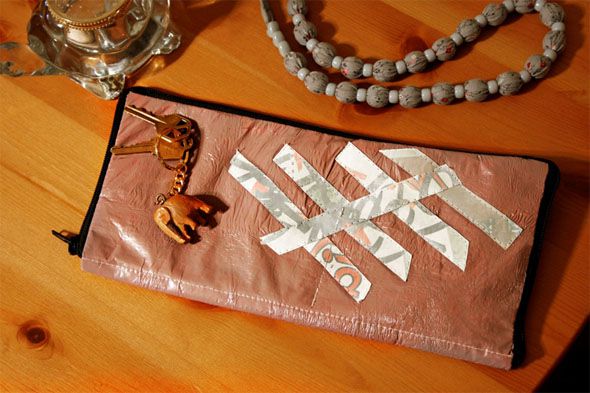
I used a white dress bag from Macy’s for my lining. The purple plastic was originally a large red Target bag. It was a nice surprise to see it come out as a cool purple/grey color…or gurple.
Step 3. Cut strips of any fused print plastic to make a cool design on the outside of your clutch. This graffiti looking print is actually from a Journey’s Shoe Store bag. Sew with a long straight stitch. It is best to sew fused plastic with long stitches to prevent it becoming perforated. Also, using straight pins will compromise the strength of the plastic. Instead, use bobby pins or paper clips to keep pieces from sliding around. Do this to both outside pieces before sewing on any of the lining. I accidently did this step after I sewed the lining. Oops!

Step 4. Cut out 5 3 inch by 6 inch rectangles to make card holders. To make your ID holder, trace your photo ID, add ¼ an inch and cut out. Fold in half and cut out a rectangle ¼ from border. Sew down 3 sides of ID holder onto lining. Then add in the card holders one at a time, sewing down 3 sides. Once all card holders are sewn in, sew lining to outside piece. Sew as close to the edge as you can.


Step 5. To make a money pocket, sew the 4 ½ inch strip and 3 ½ inch strip (overlapping each other with an opening in the middle) on top outside piece. Sew in another line to make an extra pocket.

Step 6. You should now have just two pieces left to sew together to make the actual clutch. Place right sides together and sew a ¼ inch seam along bottom. Turn right side out and sew down the seam you just made on the inside of clutch.

Step 7. All that is left is to snip the threads and sew in the zipper! To install the zipper, ideally you would use a zipper foot, but you can do without, it just takes a little longer. Zip up the zipper and, with right sides together, sew the edge of the zipper to the edge of the clutch. Sew as close as you can to the zipper teeth. When you get to the corner, cut out a little notch and round it out around the corner. Unzip the zipper and repeat on the other side. It’s similar to adding trim, but more stubborn.


