
The BladeSaver Thread Cutter is a fantastic accessory to add to any sewing room. This thread cutter is not only adorable and efficient, it just works great. Also, it has a built-in stand and doubles as a carrying case.
Assembling the BladeSaver Thread Cutter
First things first, let's assemble it. Yes, there is a little bit of "some assembly required"; however, it is super quick and easy.
What You'll Need
You'll need a couple of things. The number one item on the list is a #2 Phillips screwdriver. I say, grab your screwdriver set and randomly try until you find one that fits. Either strategy works.
To use this thread cutter, you will also need a used rotary blade. Why do I say "used"? The BladeSaver Thread cutter does not come with a blade. The thought process behind this thread cutter notion is to recycle your old blade and give it new life. We all have a blade that is just not quite sharp enough to cut fabric, or maybe it has a nick in it, but it is perfectly capable of cutting thread. This thread cutter allows you to continue to use your blade, as well as add a fantastic notion to your sewing room.
Putting It Together
Now, turn it so the hole is facing up. With a thumb on each side (Please ignore my manicure. Lost a thumbnail to dishes! Oh, responsibilities!), pull the two pieces apart.

They are held together by several magnets. They're not too strong, making them difficult to open, but they are strong enough that the pieces stay together nicely.

Remove the flower.

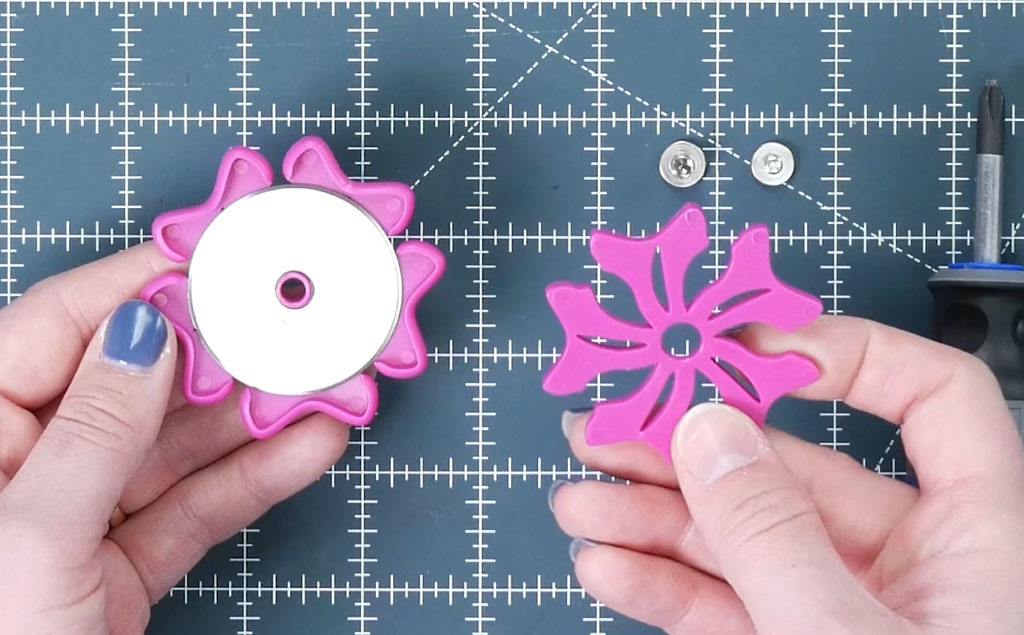
You will see that on one side there is a screw and the other has a flat base. While holding the flat part with your finger, use your screwdriver to remove the screw. Then remove the flat base. Now you can separate the flowers.
Notice that one has a lipped edge and the other is flat. Grab the one that has the lipped edge. You will see that the blade will perfectly fit in that space.
Replace the flat flower on the top. Next, put the flat base in and then the screw. I found it easiest to start the screw with your finger and then use the screwdriver. That way you don't cross-thread it.
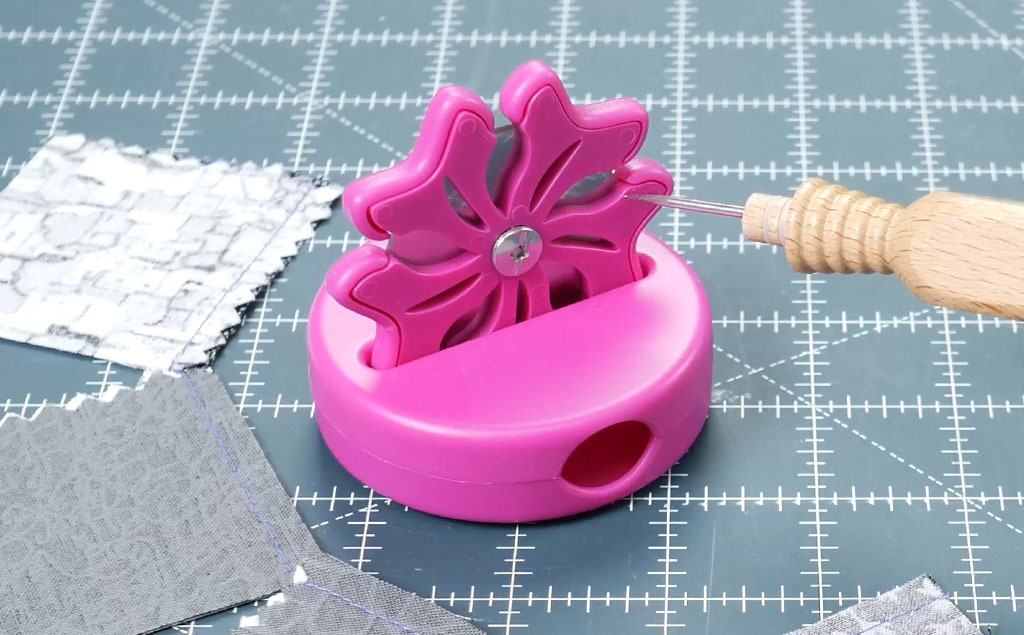
Grab your two case pieces of the BladeSaver Thread Cutter and match up the half circles. It will snap back together. Notice the slit at the top. Take your flower and pick a petal, any petal is fine. Place it in the slit. Using your two fingers on the top, push the flower in. Ta Da!
Rotary Blades That Fit
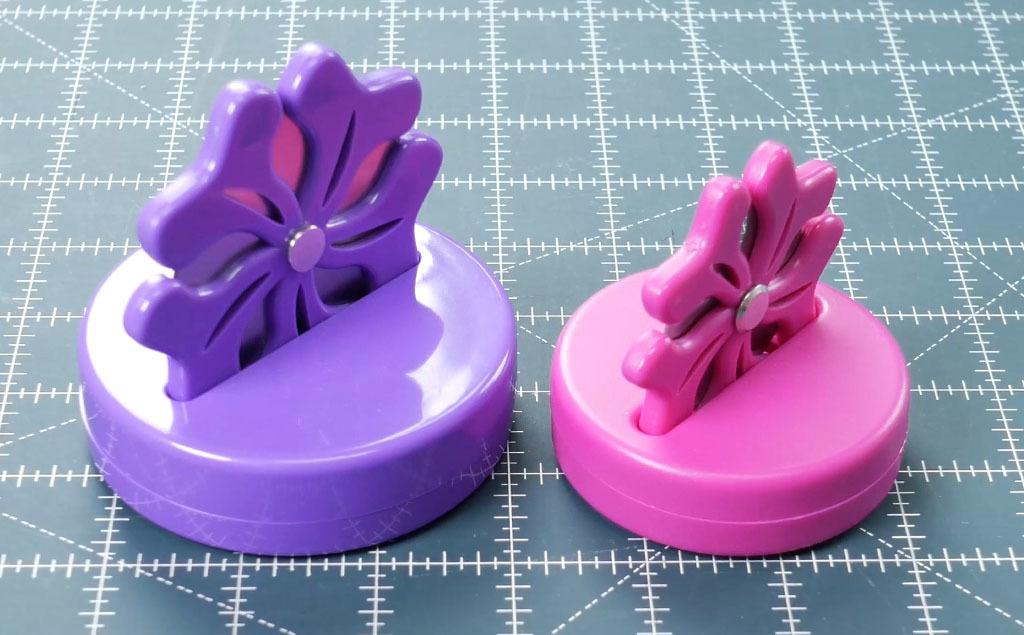
The BladeSaver Thread Cutter has two available options. You can get one that will accommodate a 45mm rotary blade or a 60mm rotary blade.
Neither thread cutter will accommodate a 28mm rotary blade. The center of the rotary blade is just too small for either thread cutter.
There is an extra benefit to getting the 60mm BladeSaver Thread Cutter! It comes with a mini screwdriver. No searching for that number 2 Phillips screwdriver!
Both thread cutters look the same, and work the same; the 60mm option is just slightly larger for the larger blade as well as the 60mm option comes with the screwdriver.
Using the Thread Cutter
The bottom of the BladeSaver thread cutter has silicone feet. This prevents it from slipping all over the place while you are using it. To use it, grab your chain pieced fabric. Simply place the fabric on each side of the thread cutter, bringing the thread down to the blade and...cut. You can use any exposed slot that you would like. As they become dull, rotate the flower. How handy is that?

Storing and Transporting the BladeSaver
Another great thing about this notion is that it is perfect for travel. Say you are going to sew with a friend or maybe you have a quilting class- no problem! Remove the flower, open up the case, place the flower inside and snap it closed. Now you can safely bring it to class without the risk of cutting yourself! Until next time, Happy Sewing, everybody!


