
The treadle sewing machine--oh my goodness! It is so neat! I just imagine where it has been, who has sewn on it, what was made on it. It is so cool to me. Recently, I began cleaning an old Singer 66-1 Red Eye machine. Once I was all done cleaning it (and I finished imagining what projects were completed on it), I needed to replace the treadle belt. I decided to share that information with you.

What You Need to Install a Treadle Belt
First things first, grab your supplies. It's not many, I can tell you that! In the video, I used treadle belt pliers and the leather treadle belt, both of which can be located on our website.

You do not, however, have to have these specific pliers; although, I found them extremely helpful. If you opt-out of using these pliers, grab a regular pair of pliers, a small nail, a hammer, and a board (just so you don't put the nail through on something important).
I also grabbed an awl which was very helpful.
Let's Get Started
If an old belt is on the machine, cut that off and remove it. Some will measure the old belt, but I don't recommend doing that. It does stretch over time. I find it best to get a new measurement.
To begin, make sure that you get the treadle belt behind the bobbin winder tire. I found it easier to work from the front and feed it to the back, starting with the end without the clip on it.
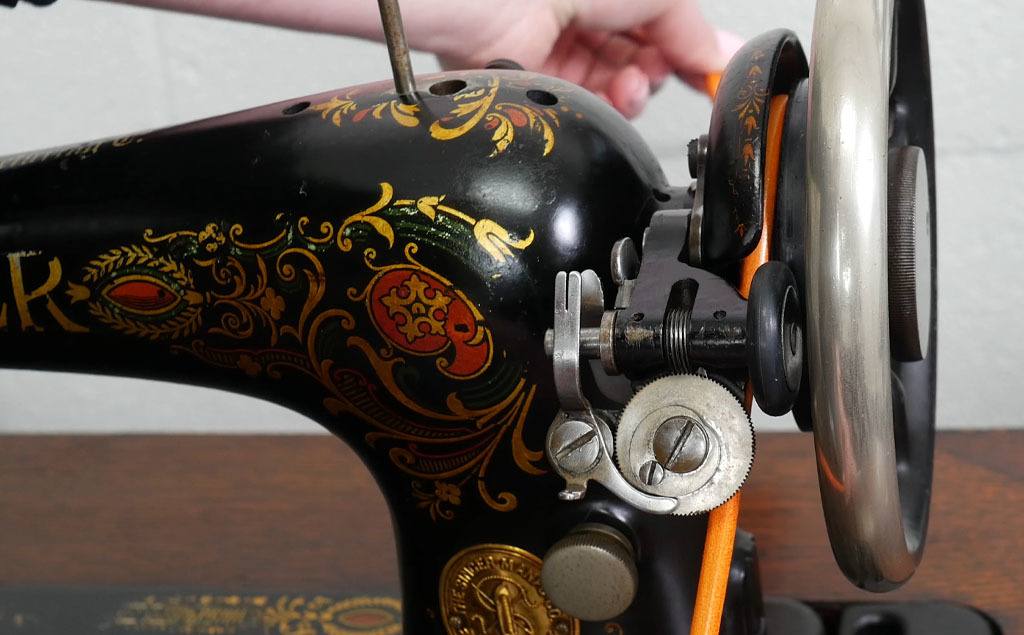
Next, work the treadle belt through the back hole of the sewing machine table.

In the back of the machine, there will likely be a belt guard. Work the belt around the wheel towards the front of the machine.

If you have an extra set of hands, that is very helpful. Otherwise, take your time and you will get it. It is a little awkward when you are trying to do it by yourself.
I found it worked best when I held one end of the treadle belt in one hand - up top - and then, using my other hand, worked the other end of the treadle belt up. There will be a hole on the underside of the sewing machine cabinet. I removed the drawer for easy access. After you feed it through the first hole, you need to work it up through the top front hole of the sewing machine table. At this point, it is very easy to pull the belt too much, so again, take your time.

Measuring the Treadle Belt
Now, we need to mark the belt. Pull the ends together until the belt is taut, but not too tight. Unfortunately, I don't have a gauge to give you a particular tightness; however, if you are unsure, I suggest erroring on the side of it being too loose. You can always go back and cut more off, but you can't add to it. Keep in mind that when you are measuring the belt, it will be installed end to end. You do not want the belt to overlap.
After you have marked the belt, carefully remove it from the machine. Technically, you can cut and punch it while it's on the machine, but I found it much easier to just remove it.
Prepping the Treadle Belt
As I mentioned above, I decided to use the treadle belt pliers. Boy, were they nice. They are a multi-purpose tool.
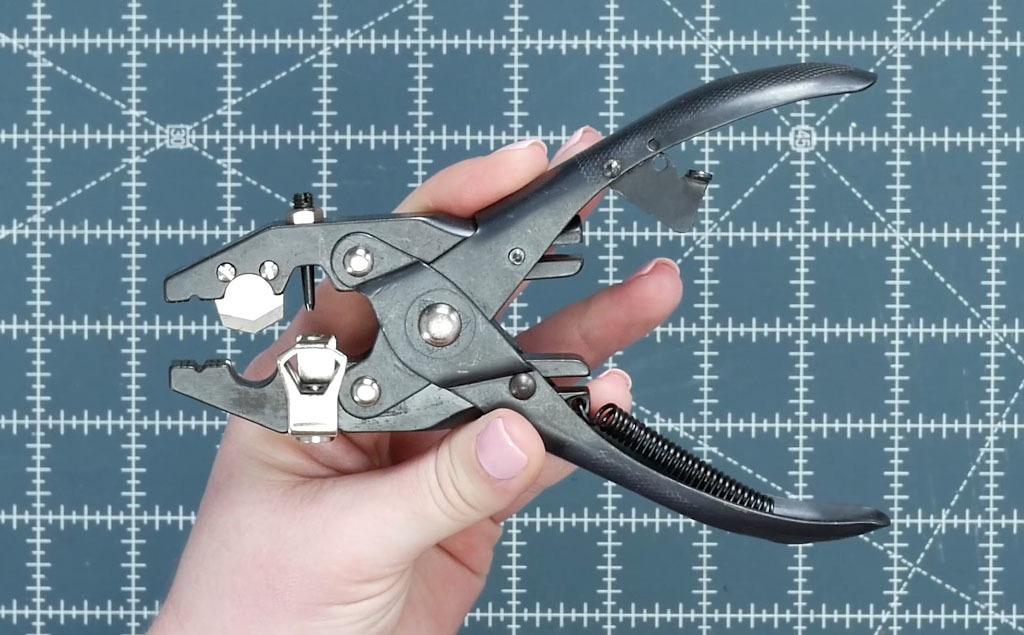
It has a clasp that you can use to keep the pliers together when being stored. It has the actual punch part of it. Keep in mind that it, intentionally, does not punch all the way through. You simply punch one side and then turn it over and punch the other side. After, grab a sharp object - I used my awl - and remove the leather.
The pliers also have a metal plate that, when you insert the belt to be punched, prevents it from going too far and you punching too far in. That is really nice. You can be confident that the hole will be in the correct place.
You also have a sharp blade that easily cuts through the leather belt. If you opt-out of using the pliers, I suggest making sure that you use a heavy-duty pair of scissors.
Lastly, there are small indentations that help prevent the clip from moving all over the place when you are trying to clamp it down. I didn't think that would be a big deal, but it proved to be helpful.
Now, you have cut your treadle belt and punched a hole in the end. Before you move back to the sewing machine, check to make sure that the clip easily inserts into the other end of the treadle belt. This extra step makes installing the belt a breeze, but if you don't do it, the too-small hole makes it very cumbersome when trying to connect the two ends of the belt at the machine.
Installation
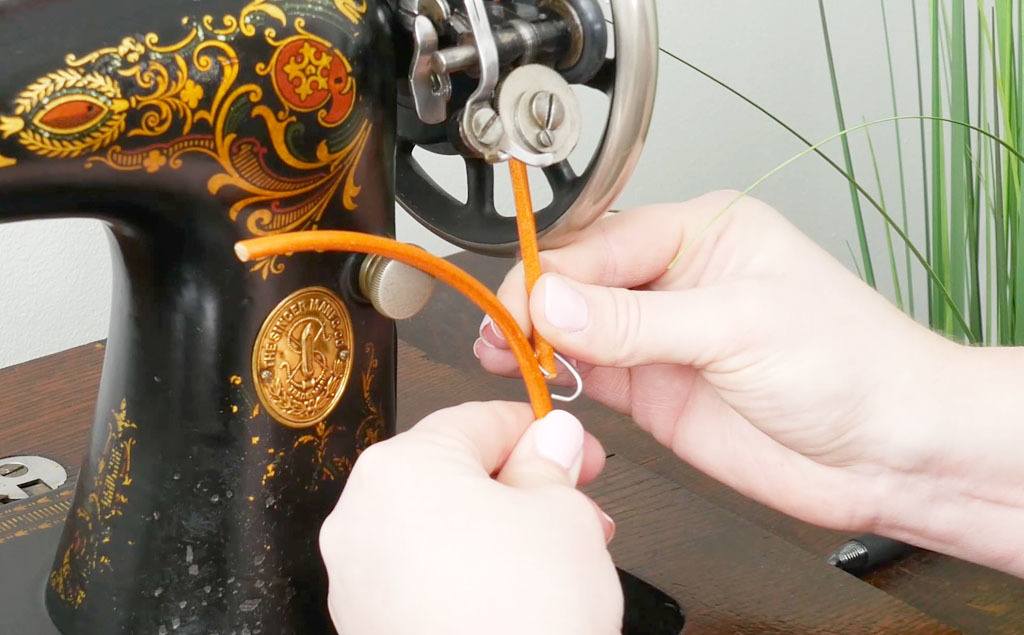
You are ready to install your belt. Feed the belt back through the way you did to get the measurement. To connect the two ends, simply pull them together and work the clip into the punched hole.

Using regular pliers or your handy dandy treadle belt pliers, clamp the clip down tight. I like to move it a little bit - make sure it feels good. Remember, you can always shorten the belt, but you can't add to it.

Now it's treadle time! Have fun and enjoy your beautiful - timeless treadle machine.
Happy Sewing, everybody!


