
Want to sew an invisible hem like the sewing pros? I like getting professional results. How about you? If so, you need to take a look at Blind Hem Presser Feet.
WHAT IS A BLIND STITCH?
First, grab your manual. Locate the page about the blind hem stitch. It will look like a heartbeat monitor. When you select this stitch, your machine will sew several straight stitches and then throw in a zig-zag stitch.
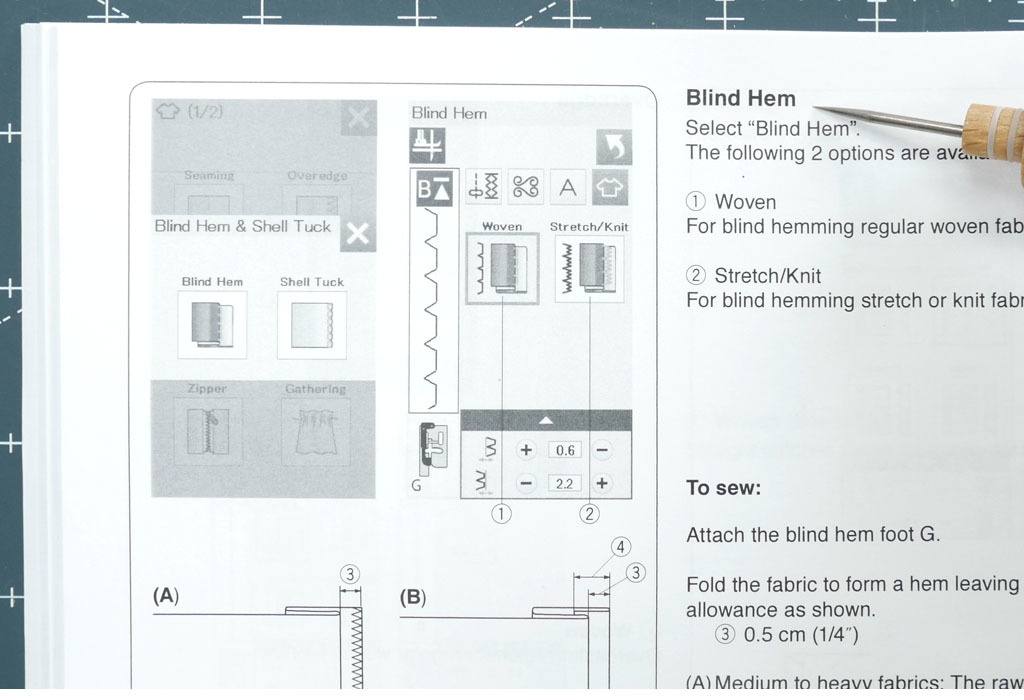
The zig-zag stitch is going to grab just enough fabric in order to hold the hem. For demonstration purposes, I am using a contrasting thread; however, when you use a similar thread color, it is hardly noticeable.
WHAT IS A BLIND HEM FOOT?
Now that you know what blind hem stitch does, pair it with a blind hem foot. This sewing machine presser foot has a guide so your fabric is perfectly placed; it produces such great results.
This is great for hems of pants and skirts, and even helpful when doing curtains.
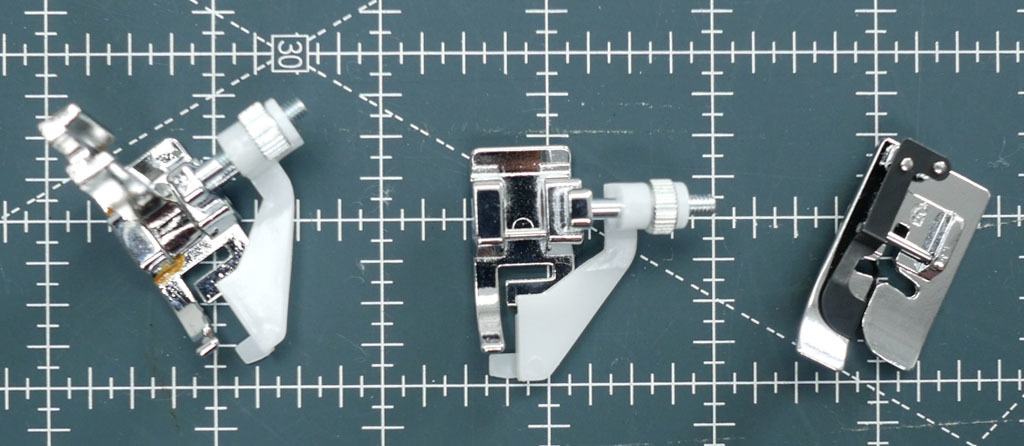
WHAT DOES THE BLIND HEM PRESSER FOOT LOOK LIKE?
Below is a picture of a few different styles. The two on the right are considered snap on feet; whereas, the one on the far left is a screw on Blind Hem Foot. The two feet on the left are considered adjustable Blind Hem Foot. This is because their guide is adjustable- or moveable. The one on the far right is just a Blind Hem Foot. The guide is stationary. You may have to adjust the settings on your machine in order for the zig-zag stitch to grab the fabric where you are wanting it to.
IS THERE A BLIND HEM FOOT FOR MY MACHINE?
Availability will vary depending on your machine make and model. If you have any questions, feel free to reach out to our customer service and someone will be more than happy to help you find a compatible option for your machine.
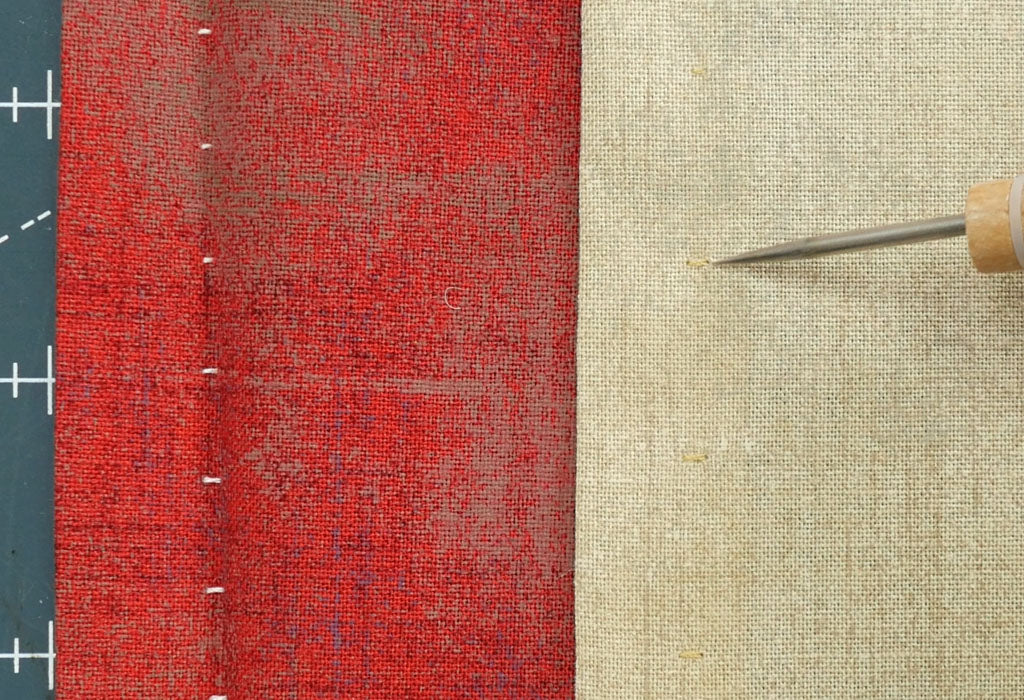
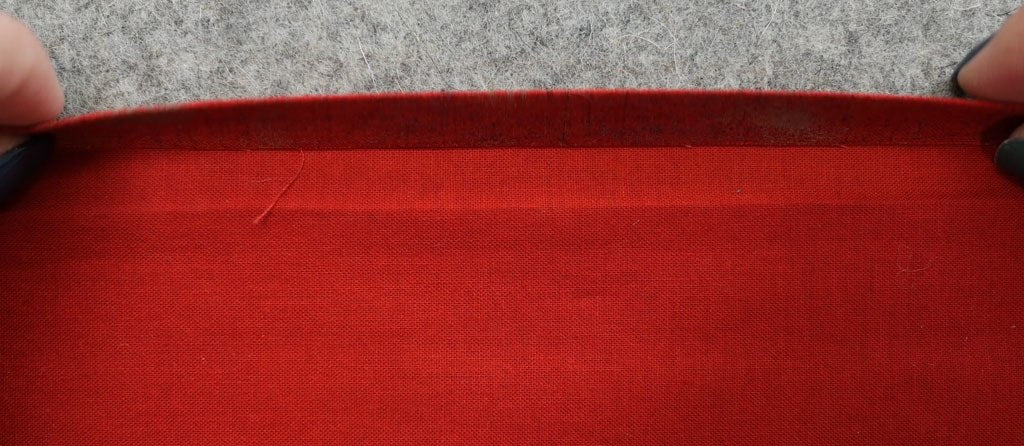
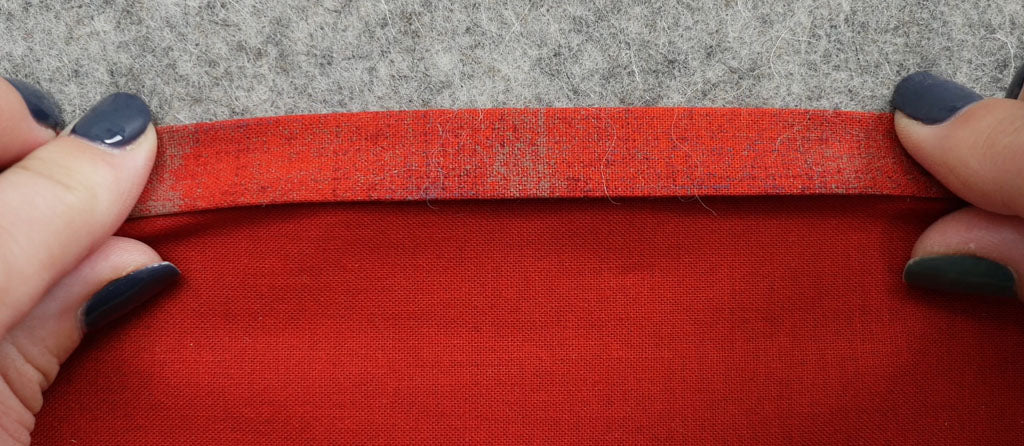
PREPARING YOUR FABRIC
With the right side of the fabric facing down, fold the raw edge in towards you (I like to work from the top of the fabric) and press your fabric. Fold it again and press one more time. Now, pinch the prepared hem and fold it under, exposing a small part of the hem -approximately ¼”. You may be tempted to press your fabric again and, I’m not going to lie, when I first started using the blind hem foot, I did; however, oftentimes, it is hard to get that crease out. We are trying to accomplish an invisible hem so, if you can, at this point, don't press the fabric. You can use pins or fabric clips, like Wonder Clips to hold it in place.
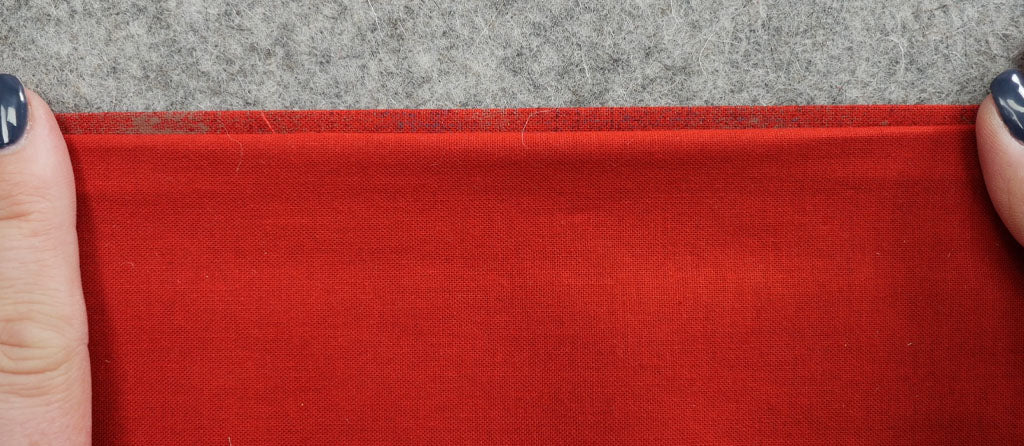
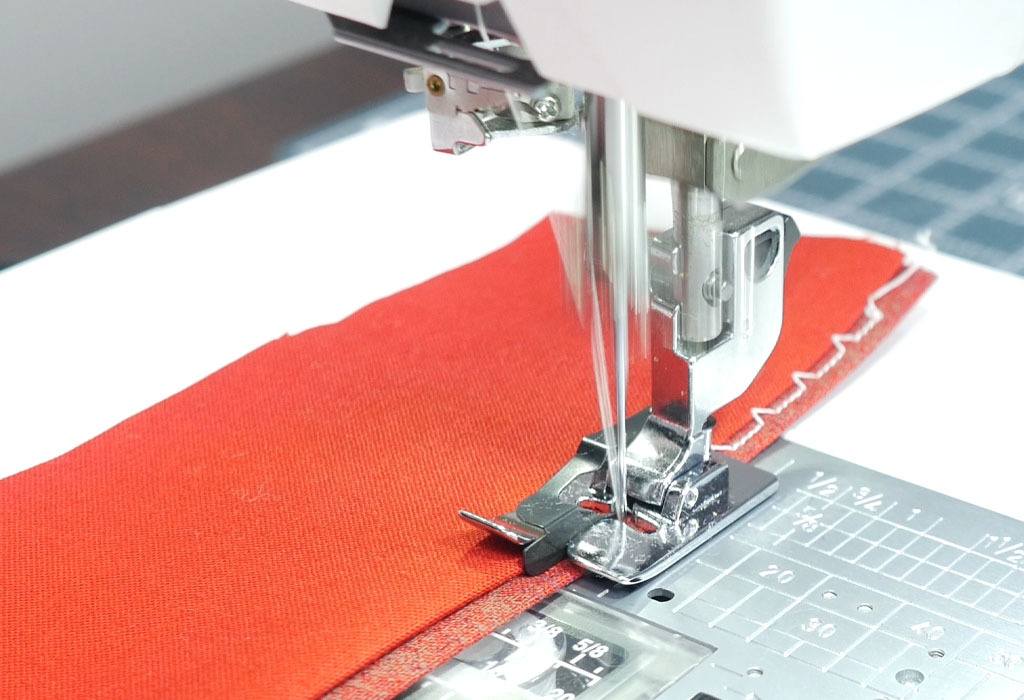
HOW DO I USE THE BLIND HEM FOOT
Bring it to your sewing machine and line up your fabric against the guide. If using the one with an adjustable guide, move it to where you need it positioned. If the foot doesn’t have a guide, select the settings needed according to your manual. You will want to test it first on some scraps and make sure the zig-zag stitch is grabbing the amount of fabric that you are wanting it to. Also, the length of the stitch can be changed. In the picture below, on the left, I had the stitch length set to 2mm and, on the right, it is 3mm. See how a simple adjustment can make a big difference?

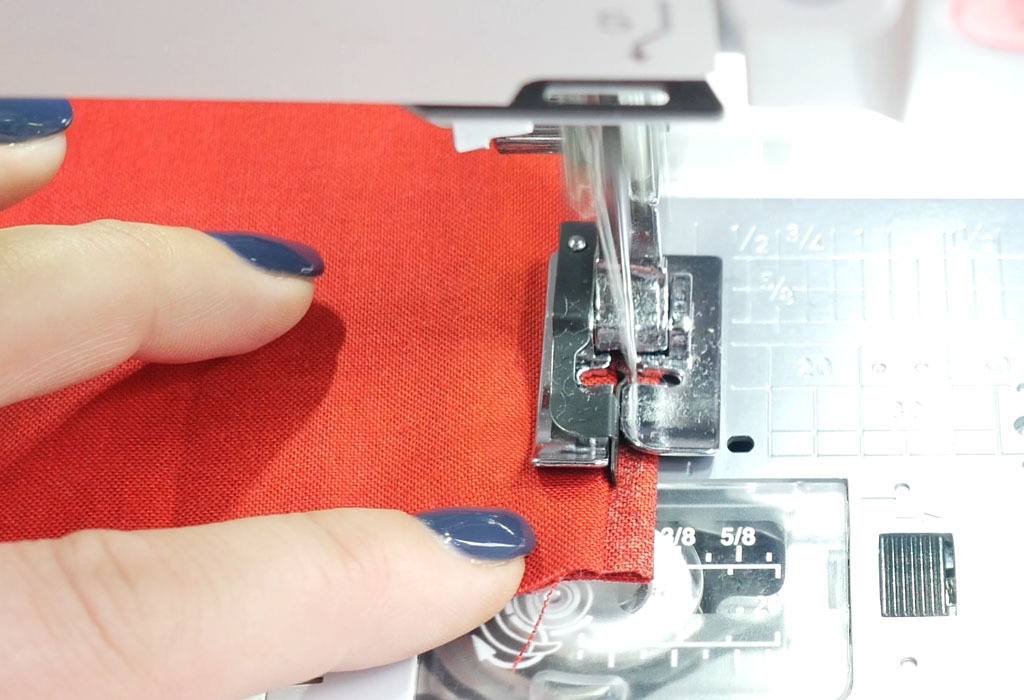
After you have finished sewing, Fold the hem back and press one last time. The hem on those pants is going to look so good! Until next time, Happy Sewing, Everyone!


