
Making a buttonhole can seem daunting when you first look at a buttonhole foot. Don't worry. The one-step or automatic buttonhole foot makes it easy. Although it looks a little confusing, the one step buttonhole foot is pretty straightforward.
Anatomy of a One-Step Buttonhole Foot
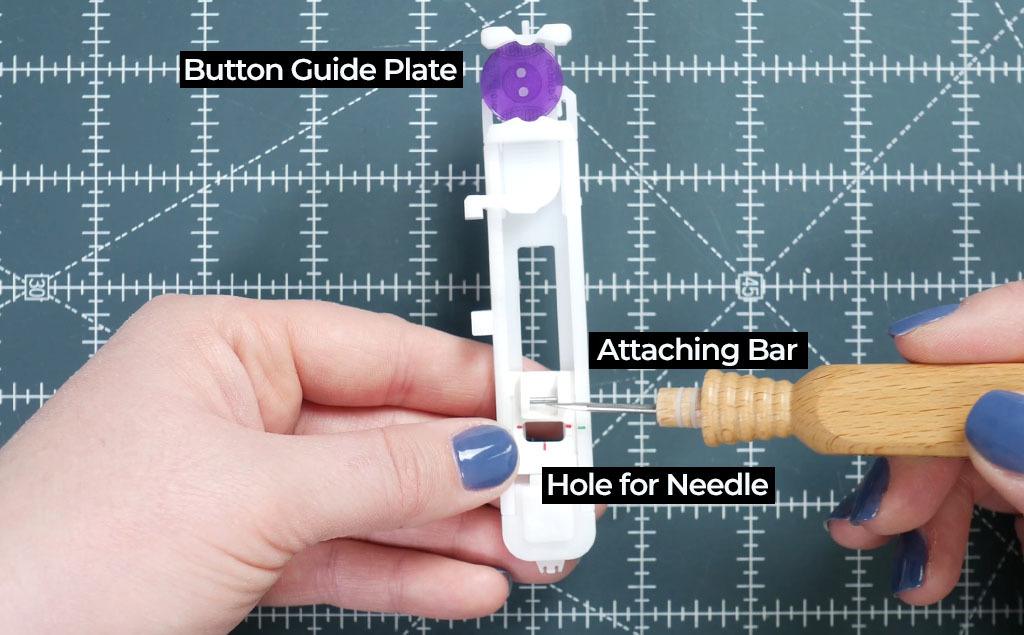
There is a sliding plate at the back of the foot called a button guide plate. It slides out to hold your button. After you place the button, push it back in to secure the button in place. Notice on the left-hand side, depending on the size of the button, the amount of space between the button guide plate and the bracket varies. This will come into play when you're at the machine.
Next, you have the small bar where the presser foot (or the shank) attaches to the foot.
Lastly, the small hole is where the needle goes down into the machine.
Attaching it to Your Machine
Because the thread has to be under the buttonhole when you begin doing your buttonhole, I find it easiest to put the thread through before you attach the foot. Once through, lift your presser foot and slide the buttonhole foot under. It's not well known, but after you lift your presser foot up, you can usually lift it just a little more. This helps get the buttonhole's bar lined up with the shank. After everything is lined up, lower your presser foot and the foot will snap in.
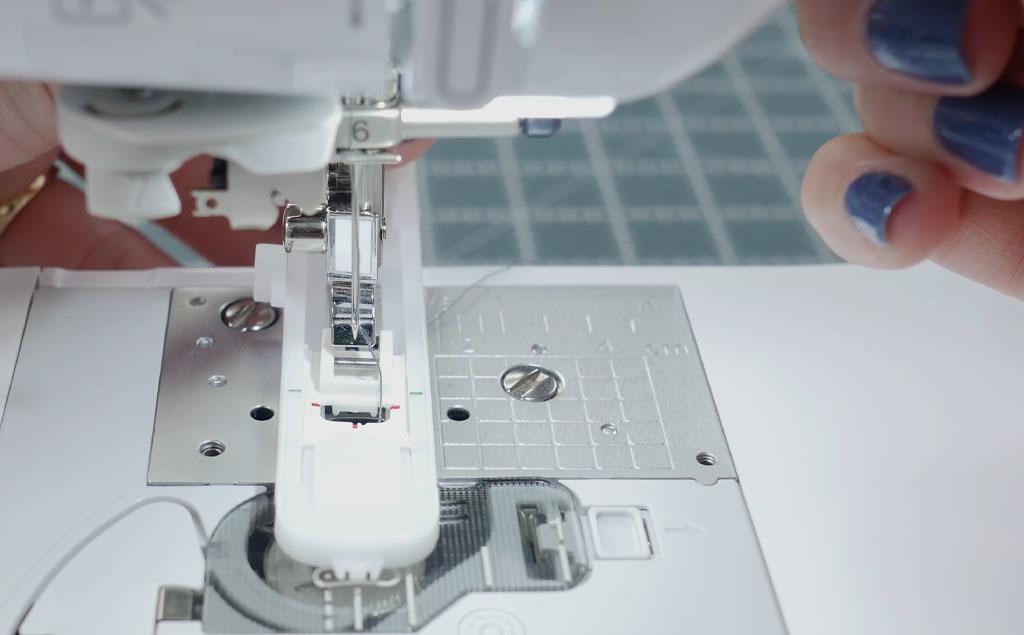
After the foot is snapped in, you need to lower the buttonhole lever. It needs to be positioned behind the bracket.

As the foot moves, the lever will reach resistance from either the bracket or the back of the button guide plate. This tells the machine how large to make the buttonhole.
Selecting the Proper Stitch
Once you have attached your presser foot, it is time to select the proper stitch. Depending on your machine, you may have a few buttonhole options or you may have several.
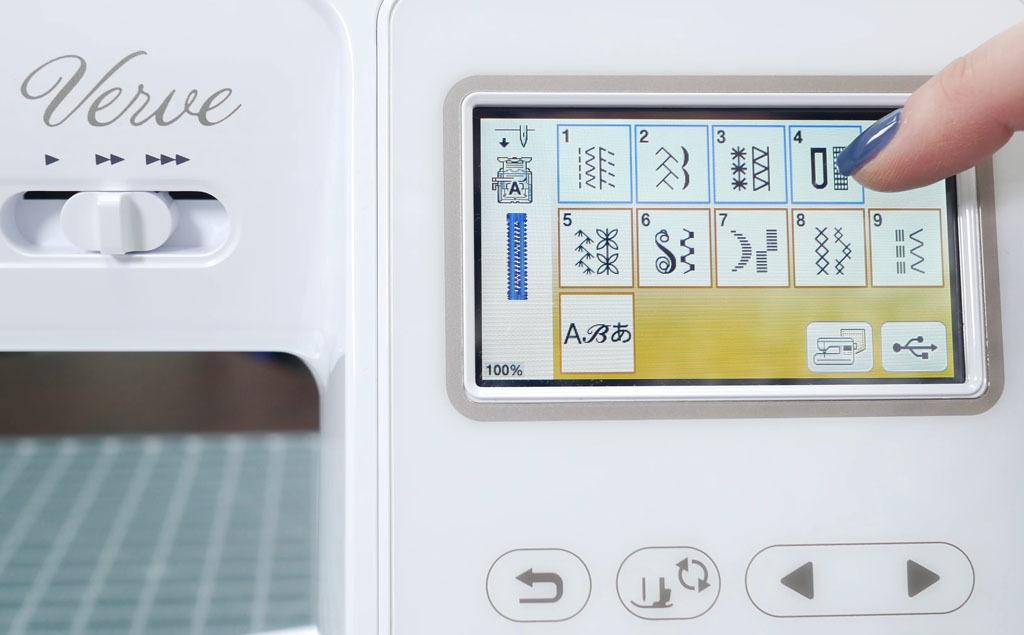
Your manual will tell you the names of each type of buttonhole, as well as tell you when it is appropriate to use.
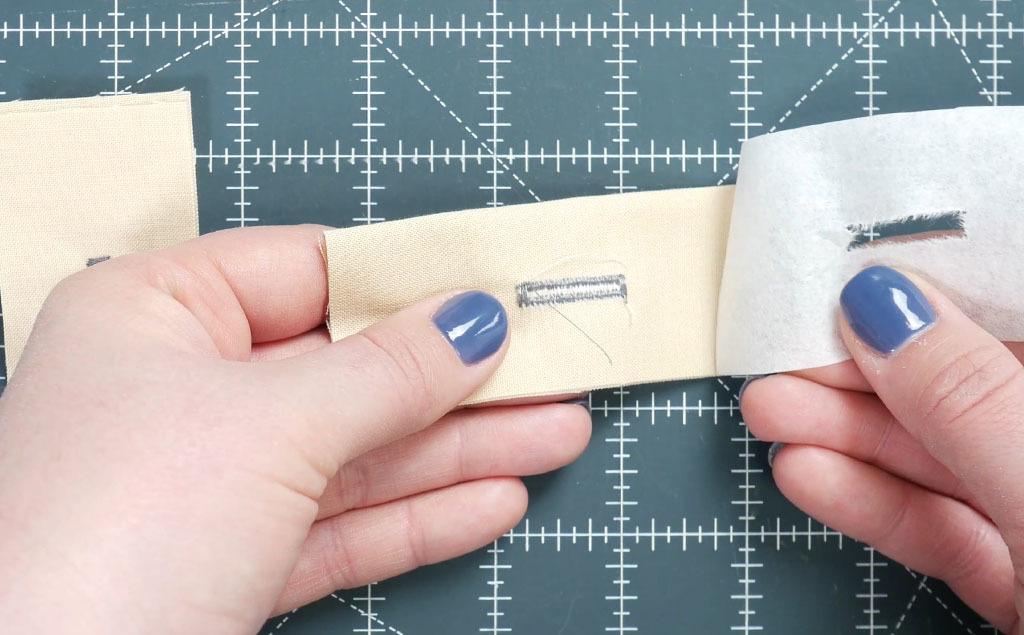
Preparing your Fabric to Make a Buttonhole
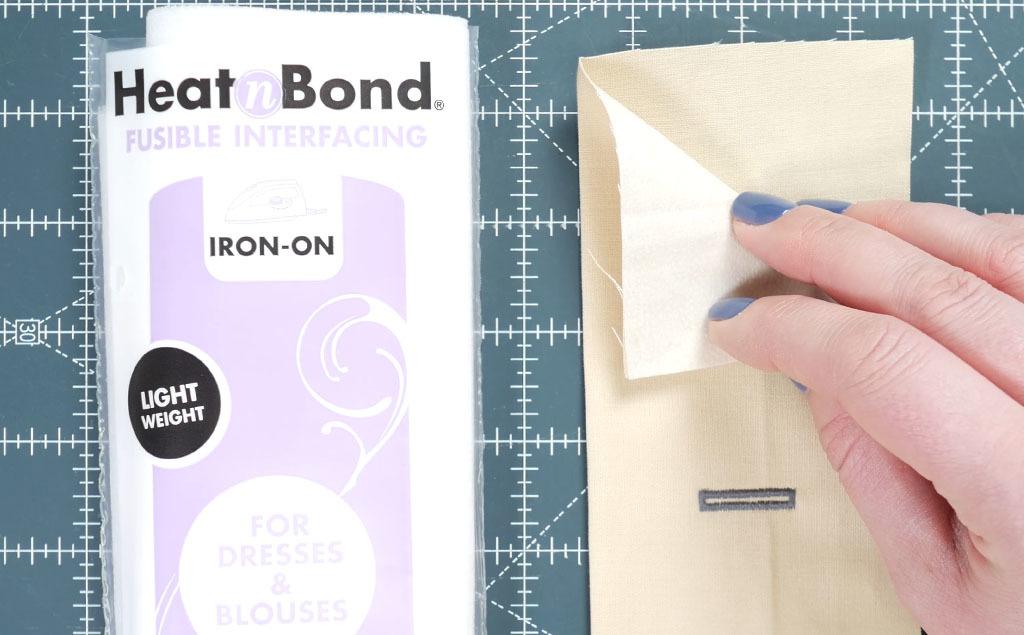
You may hear that it is not necessary to use interfacing; however, I suggest getting in the habit of using it. It helps the fabric maintain its structure and integrity. Consider the number of times that you will be buttoning and unbuttoning your garment. It would be a shame to go through all the work and then the fabric starts tearing at the buttonhole.
Using a Buttonhole Foot to Sew A Buttonhole
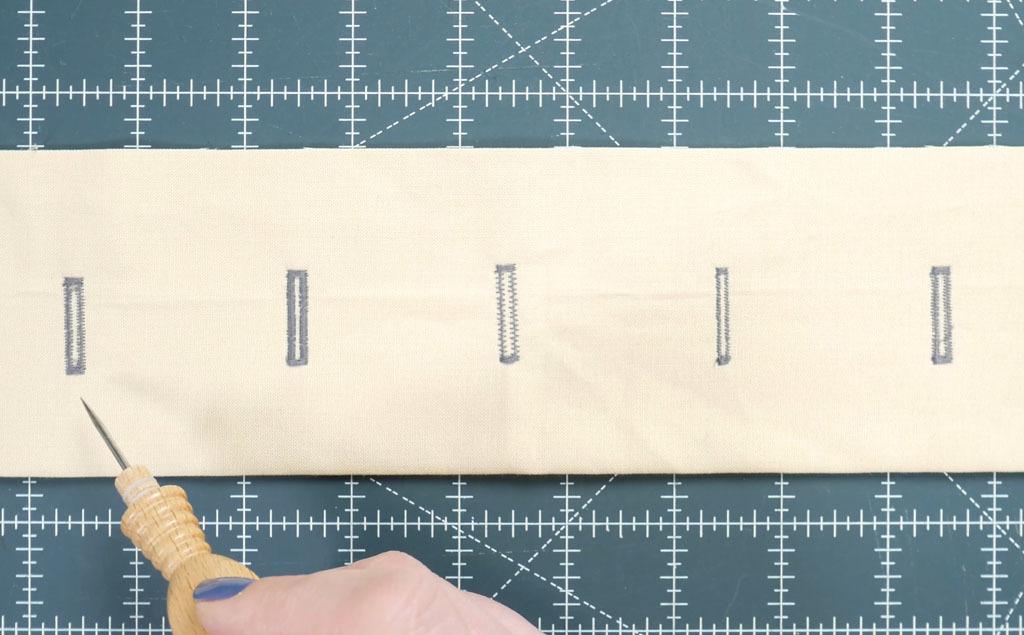
After you have selected the proper buttonhole and your fabric is prepared, you can move forward with sewing your buttonhole. Mark your buttonholes on your garment. The buttonhole foot moves from front to back so keep that in mind when making your marks. Always test on scraps so that you not only understand the movements of a buttonhole foot, but by doing this, it also gives you time to work out any kinks before moving to your actual project.
I like to slide my fabric underneath the foot and then, before lowering the foot, rotate my handwheel towards me, lowering the needle on that spot. Then lower your foot. When using a one step buttonhole foot, you simply press the foot control or the Start/Stop button and it will be done in one fell swoop. After the buttonhole is complete, your machine will automatically secure the ends.
What is a Buttonhole?
A buttonhole is made up of bartacks and satin stitches. A bartack is a series of tight stitches that are placed in areas on a garment that undergo stress. Common places that you will see them are, of course, on a buttonhole, but also near pockets. Satin stitches, which make up the sides of a buttonhole, are simply zigzag stitches really close together.
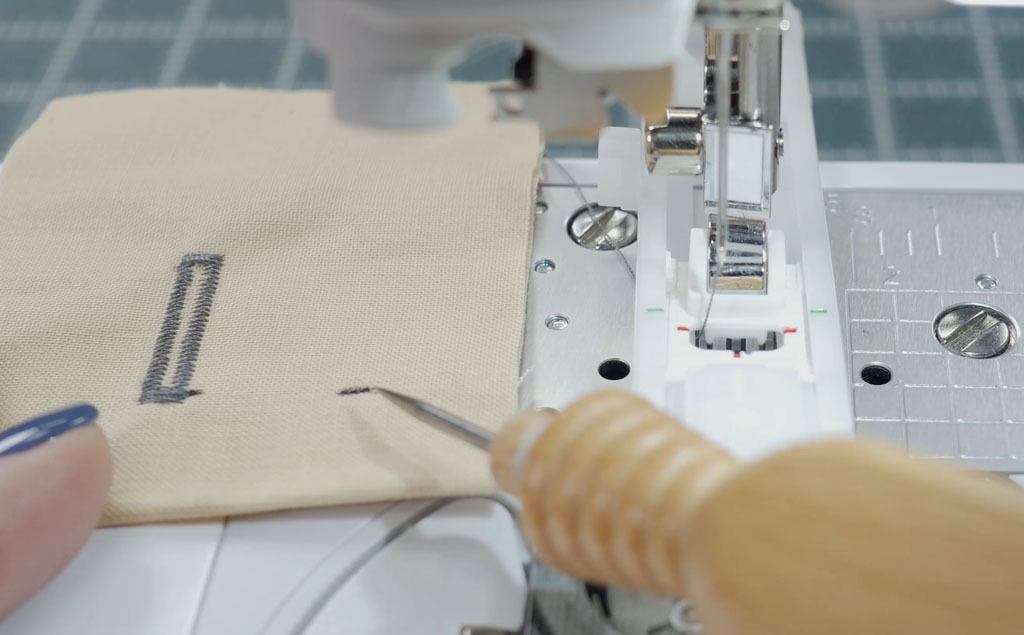
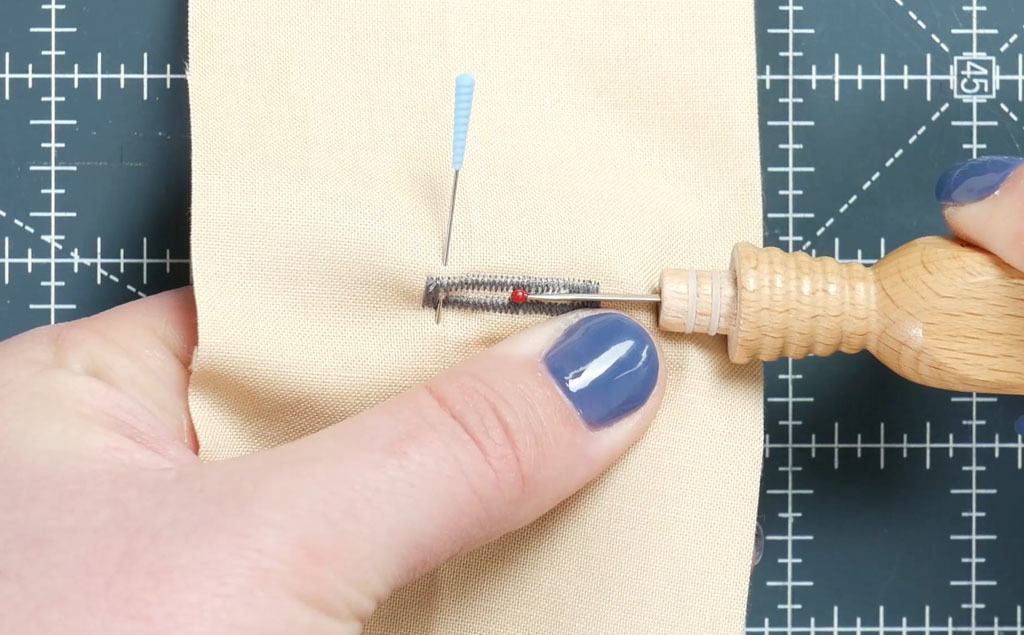
Opening Your Buttonhole
After you have completed sewing your buttonhole, it's time to open it up. I like to place a pin horizontally across to keep from cutting through the buttonhole. Then, taking a seam ripper, poke a hole and carefully cut it open.
Fixing your Buttonhole
Sometimes you will see that your buttonhole comes out sloppy and the stitches don't look right. As previously mentioned, use interfacing. This is going to solve a lot of your issues.
If you are having lots of issues, you can also use stabilizer in addition to the interfacing. Keep in mind, interfacing stays with the project; whereas, stabilizer does not. I do not often use stabilizer; however, when I do, I like to use tearaway. That way, when I am done stitching out my buttonhole using the buttonhole foot, you simply tear off the stabilizer.
Adjusting Your Settings for a Buttonhole
You can also play with the stitch length and the stitch width to get your buttonhole to the desired look. As an example, when I select a buttonhole on my machine, it automatically sets the stitch width and stitch length to a good starting point. However, I tend to prefer a denser buttonhole so when the stitch length is a .4, I usually decrease it to a .2. This is why it is important to test on scraps. You are also able to play with the width, making it more narrow or wider.
Other Types of Buttonhole Feet
If your buttonhole foot doesn't look like the one I showed you, that's okay. There are many different kinds. Some common ones are an automatic sensor buttonhole foot, a 4 step buttonhole foot, and a snap on buttonhole foot.
Sensor Buttonhole Foot
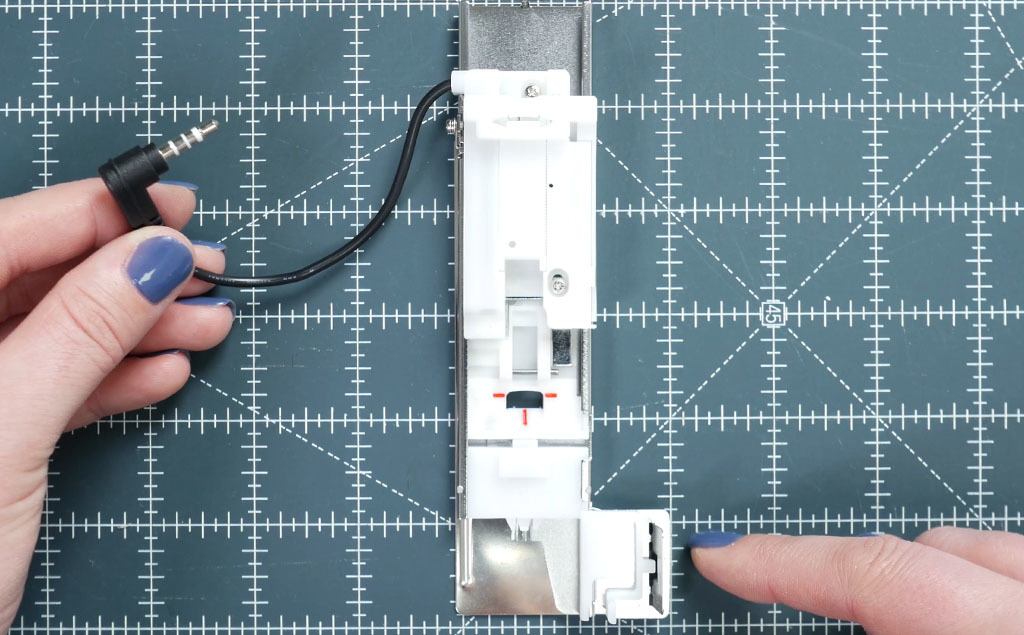
The sensor buttonhole foot has a cord that's attached to the foot that then attaches to the machine. Where the buttonhole foot that I am showing you has the lever that tells it how large to make the buttonhole, the sensor does all of that.
4-Step Buttonhole Foot
The 4-step buttonhole foot looks similar to the buttonhole foot that I am showing you, only more simplistic. Instead of pressing your foot control or Start/Stop button and everything is done in one step, with the 4-step buttonhole foot, you are responsible for each step. To understand how this particular foot works, check out our Beginner's Guide to Sewing: episode 13, Zippers, Buttons, and Everything In Between. Because we cover "everything in between", to jump forward in the video, you can go to timestamp 13:38.

Snap on Buttonhole Foot
You may also see snap on buttonhole feet. This type of buttonhole foot, although I have not used it before, states that it, too, is a 4 step buttonhole foot.

Just check your manual and it will walk you through everything, step by step.
Conclusion
I hope that this has helped you understand how an automatic buttonhole foot works. If you're in the market for a sewing machine, I highly recommend getting one that is a touch more advanced so that you will be able to get this feature. I find it super convenient and much easier than a 4 step buttonhole foot.
Until next time, Happy Sewing, everybody.


