I've seen tons of beautiful sewing machine covers online. I've always wanted to make one, but inspiration never hit - until this week. For me, the purpose of a sewing machine cover isn't just about protecting it from dust. It was about creating something inspiring. A design that represented why I love to sew and encourages me to continue sewing what I love. Most of us have a personal connection with our machines, after all they allow us to express our creativity. So, if you don't already have a cover you absolutely love, I encourage you to take the time to delve into your artistic side and make a cover that represents you. I would be honored to see the covers you've made!
 Have you ever just had a fabric combination pop in your head randomly and thought, "why didn't I ever think of this before?" I was listening to Mumford and Sons "The Enemy" when this design just materialized in mind. Then, of course, I had to listen to their albums over and over and over again while working out the specifics. Now I have a great machine cover and know all the words to Babel. Yesssss. Thanks, Mumfords and Sons!
Supplies
1/4 yard of pearlescent fabric
1/4 yard of beaded tulle
1/8 yard of sari fabric (I don't really know if this is 'sari fabric', I just call it that because that's what I thought of when I first bought it)
1/8 yard of batting
1 1/4 yard of muslin
^the above measurements may differ depending on your machine measurements
Scissors or rotary mat and cutter
Serger (or overcast foot)
Quilting guide bar
Iron
Step 1 - Measuring
Measure the height, width, and depth of your sewing machine. Make sure to include the protrusion of the hand wheel, bobbin winder, and any other part that extends outward. I have a Brother LB 6800; my machine measurements are11 1/4 X 14 3/4 X 7 1/4 . That being said, I did slightly 'over' measure, just in case.
Now add 1 inch to your measurements to account for a 1/2 inch seam allowance. So, mine are 12 1/4 X 14 3/4 X 7 1/4.
Step 2 - Muslin Underlining
Cut 2 rectangles to the height and width of your machine from the muslin fabric.
Cut 1 long strip to the depth of your machine and to the height x 2 + width.

Baste the Muslin pieces together to make the mock-up of your machine cover. If everything fits perfectly, congrats! You are ready to take out the basting stitches and use the muslin as your pattern.
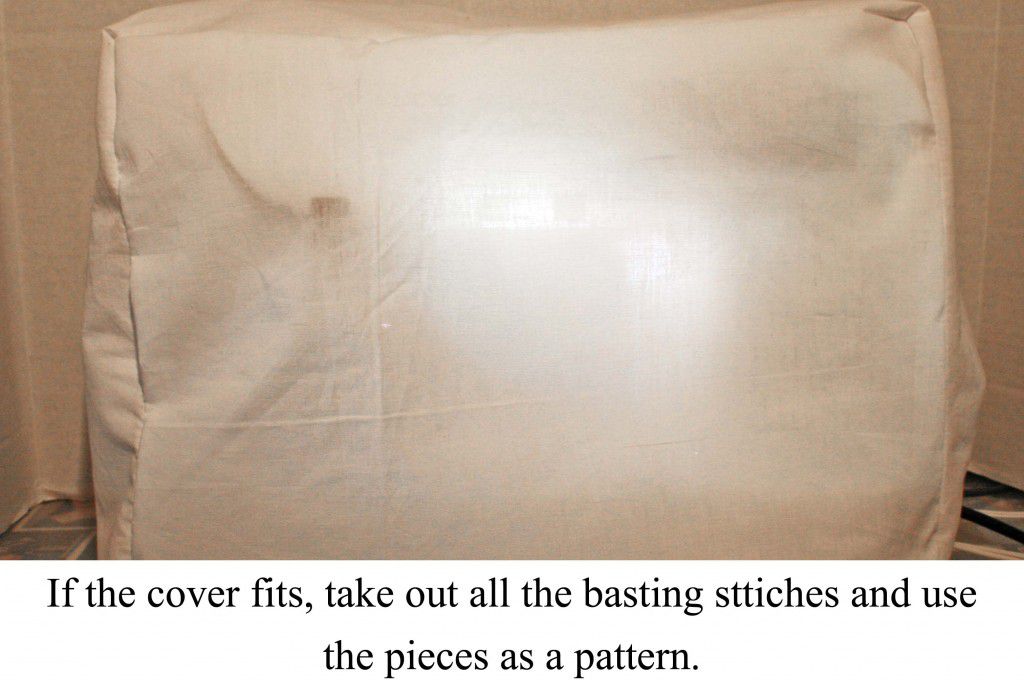
I had to take 3 1/2 inches off the strip and increase my seam allowance to 3/4 inches for the ideal fit.
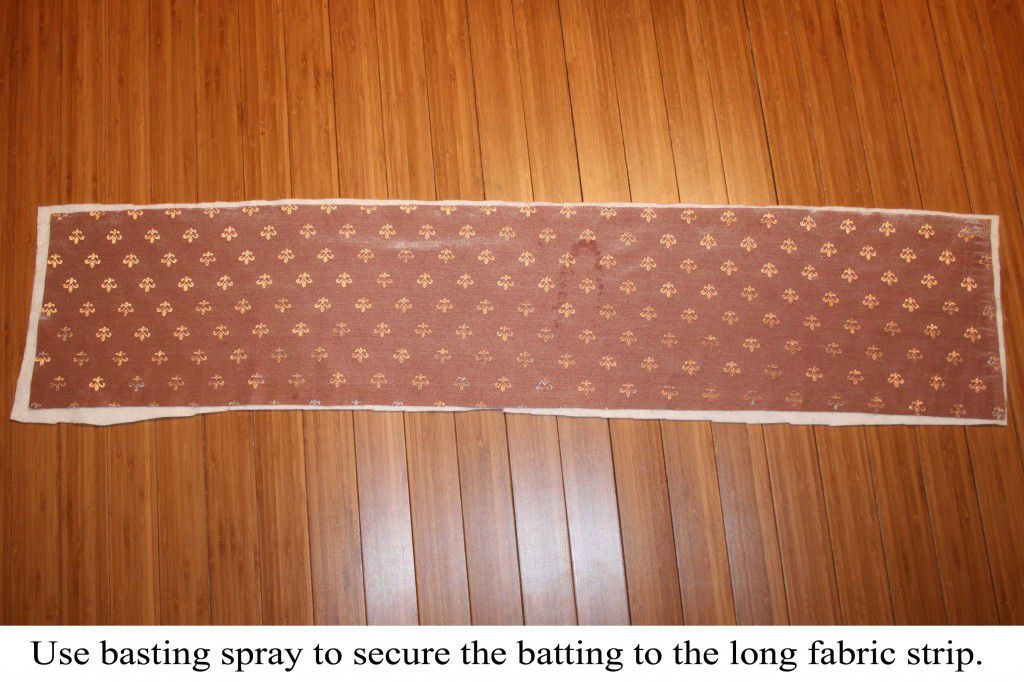
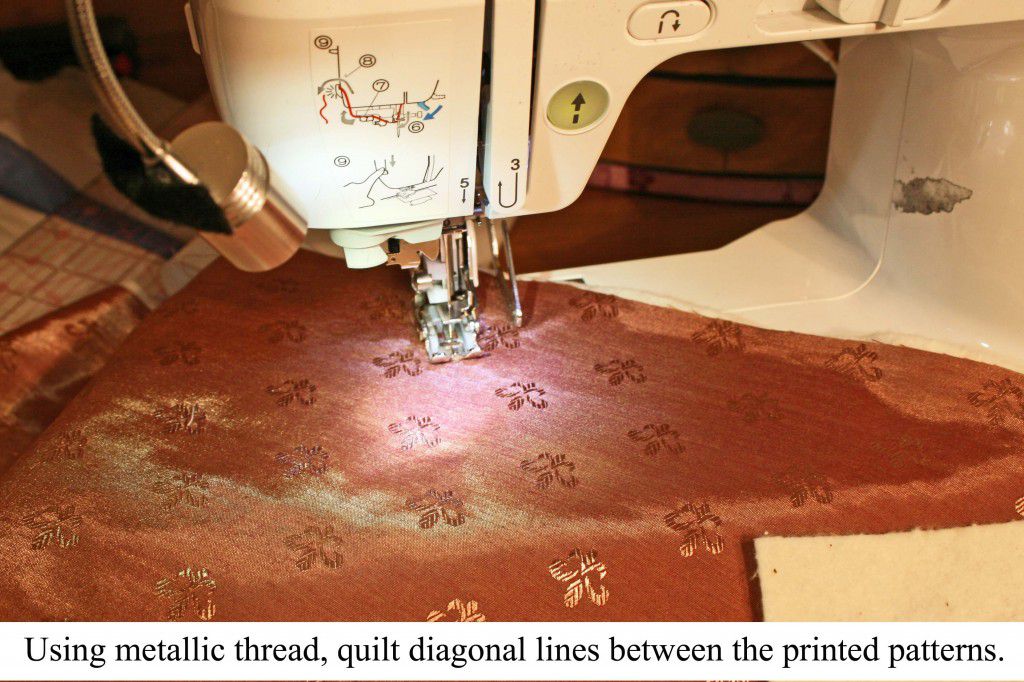
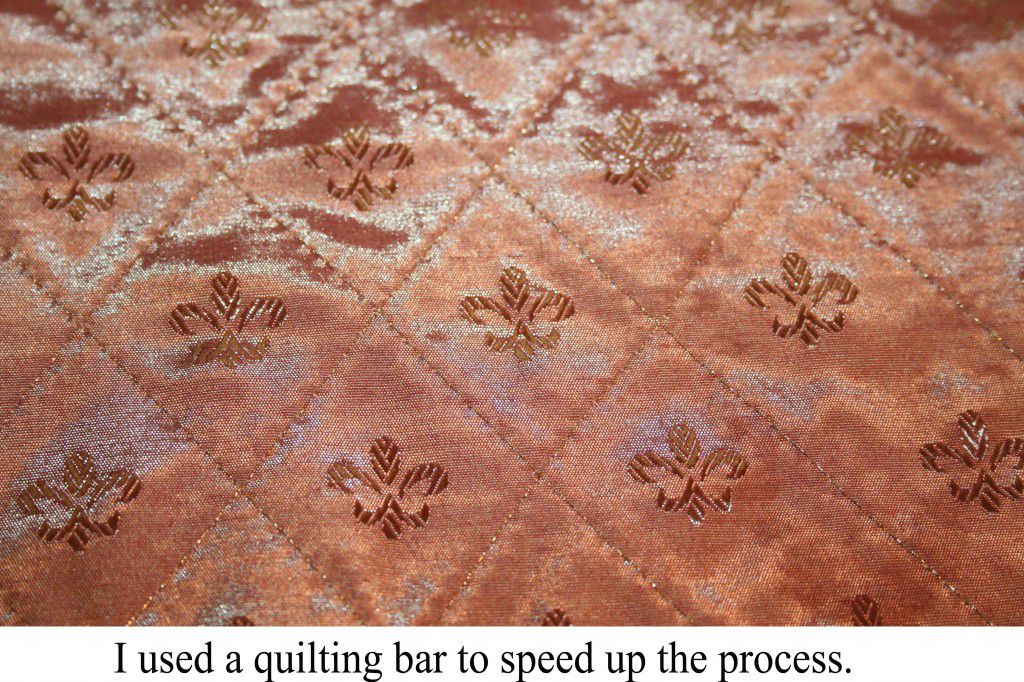
Step 2 - Making the Quilted Center Strip
Use the muslin pattern piece to cut another strip from the sari fabric. Use basting spray to secure the sari strip to a strip of slightly larger batting.
Install your walking foot, quilting bar, metallic thread, and metallic needle. Quilt diagonal lines in between the sari print. Cross back over the first diagonal lines. I increase my stitch length to a 5.0 for a bolder stitch.
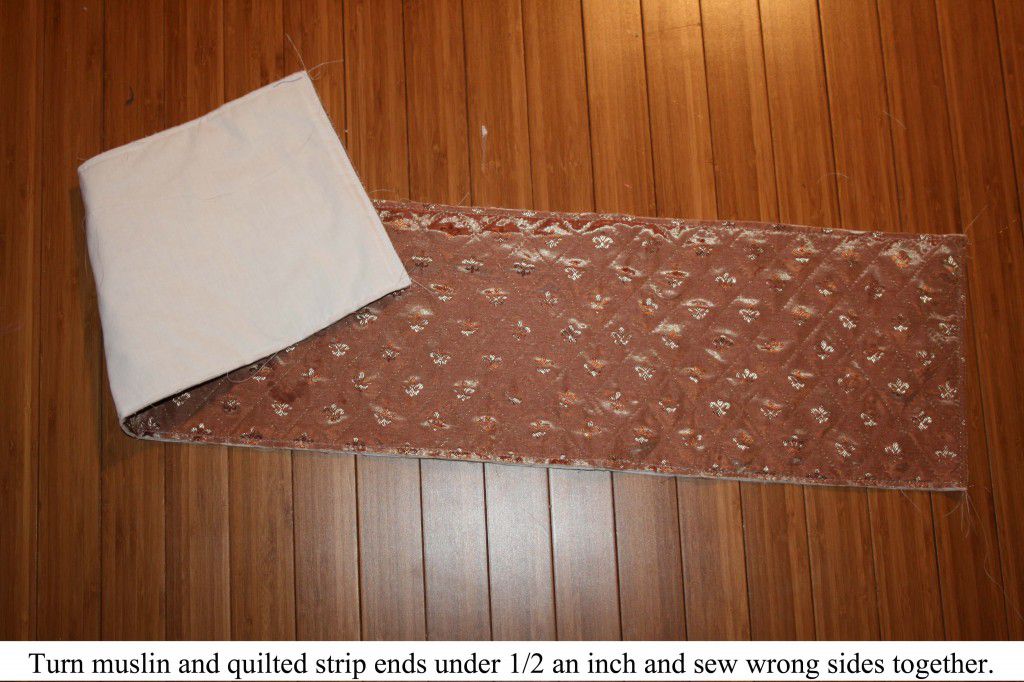
Turn the end of the muslin strip and the quilted strip under 1/2 an inch and sew wrong sides together.
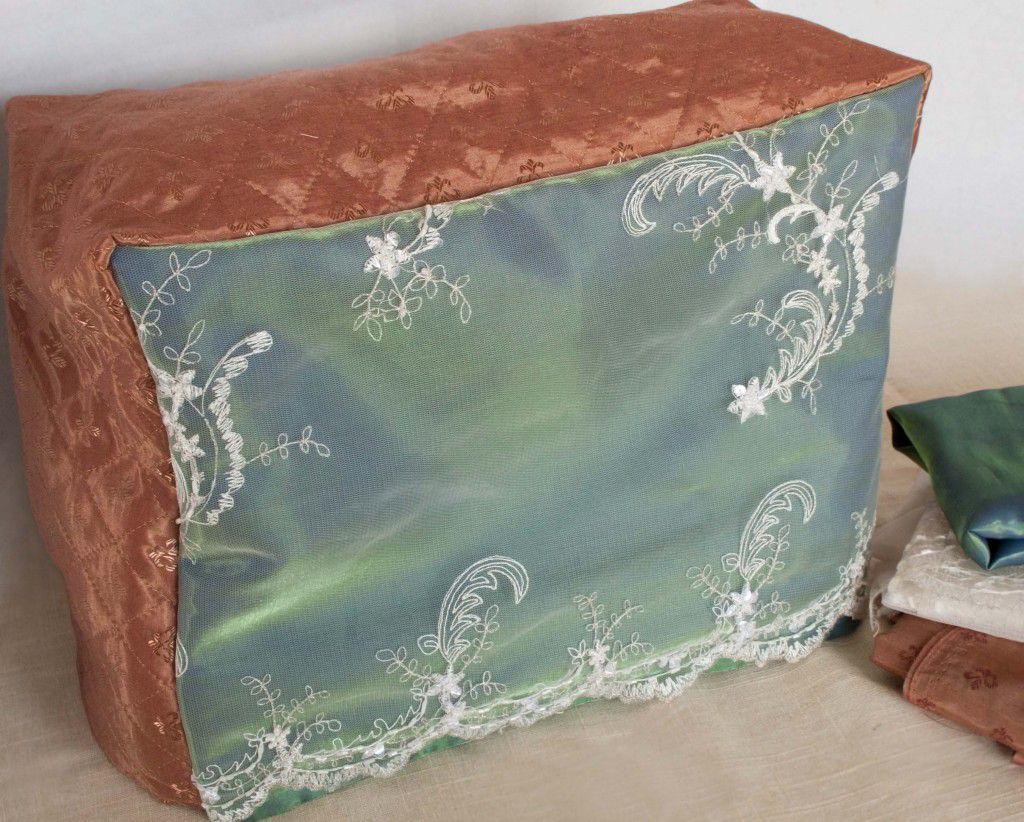
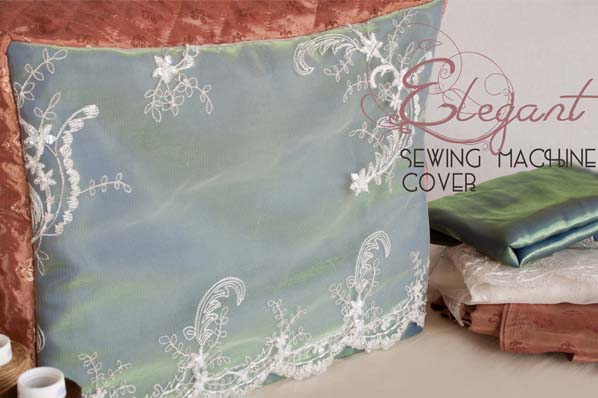
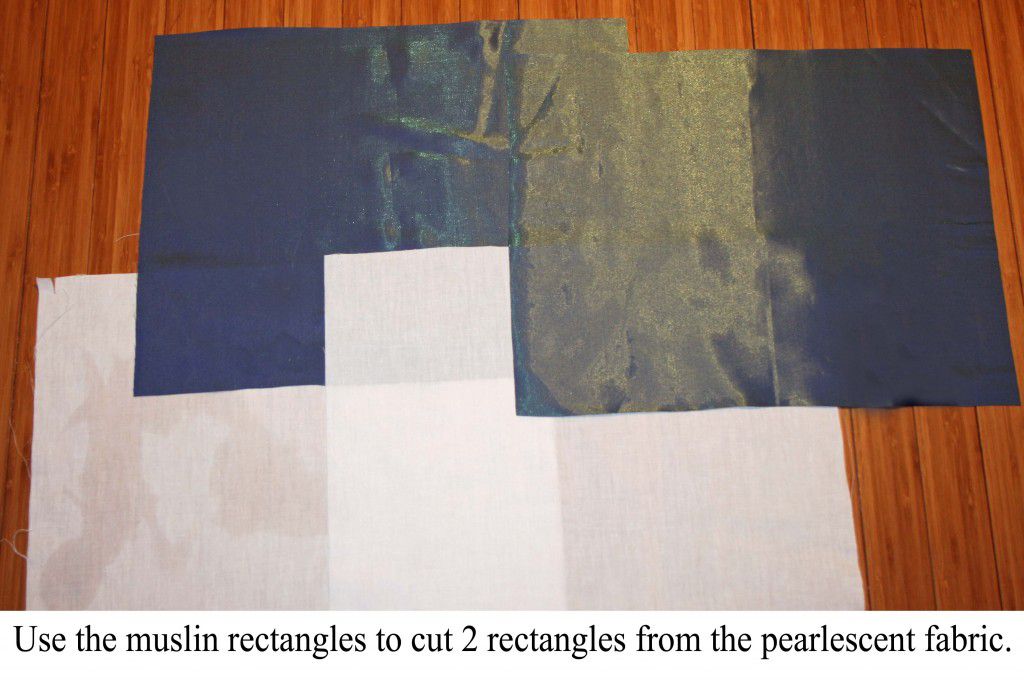
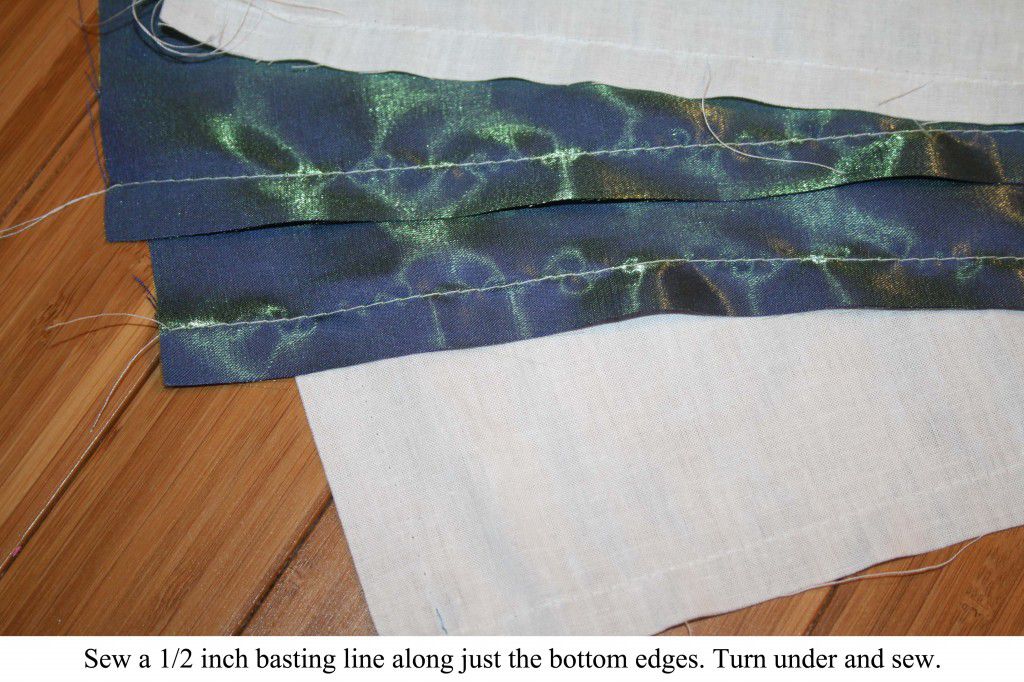
Step 3 - Cutting and Hemming the Green pearlescent Fabric
Cut 2 rectangles from the green pearlescent fabric. Use your muslin rectangles as a pattern.
Turn just the bottom edge of the green and muslin under 1/2 inch and sew.
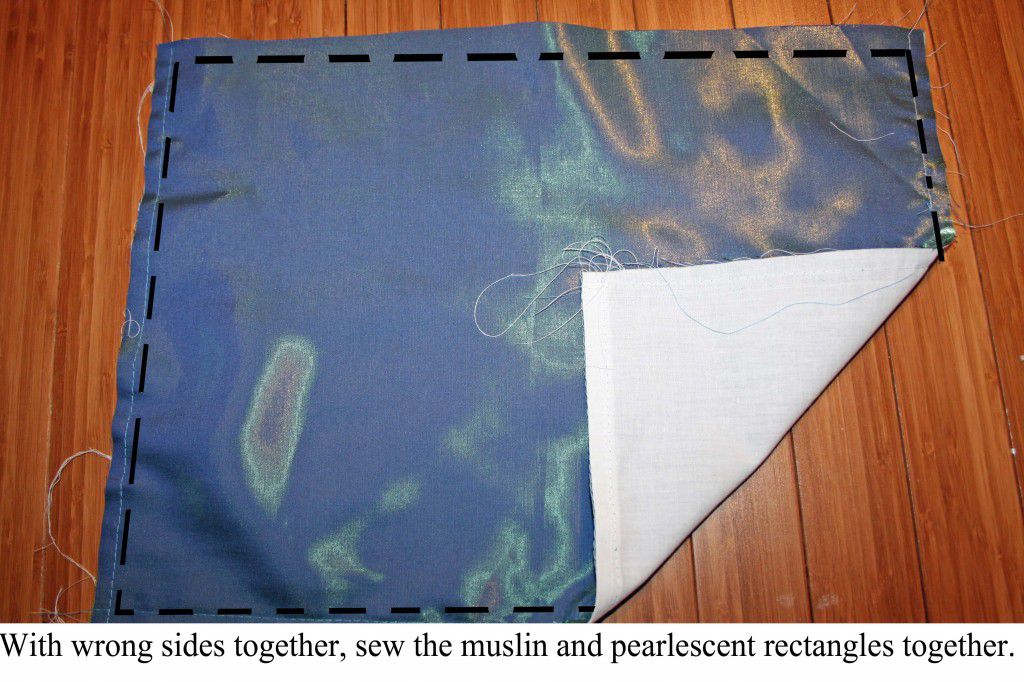
Step 4 - Layer the Green and Muslin
With wrong sides together, layer the 1 green and 1 muslin rectangles together and sew with a 1/4 inch seam. Make sure both hemmed sides are sewn together. Repeat with the remaining green and muslin rectangles.
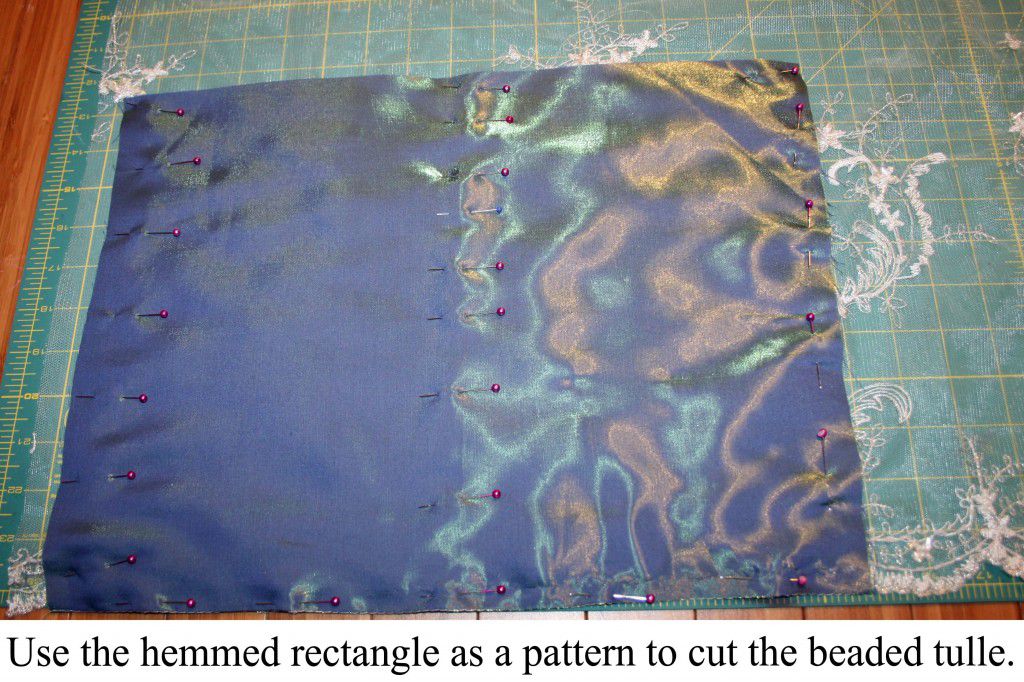
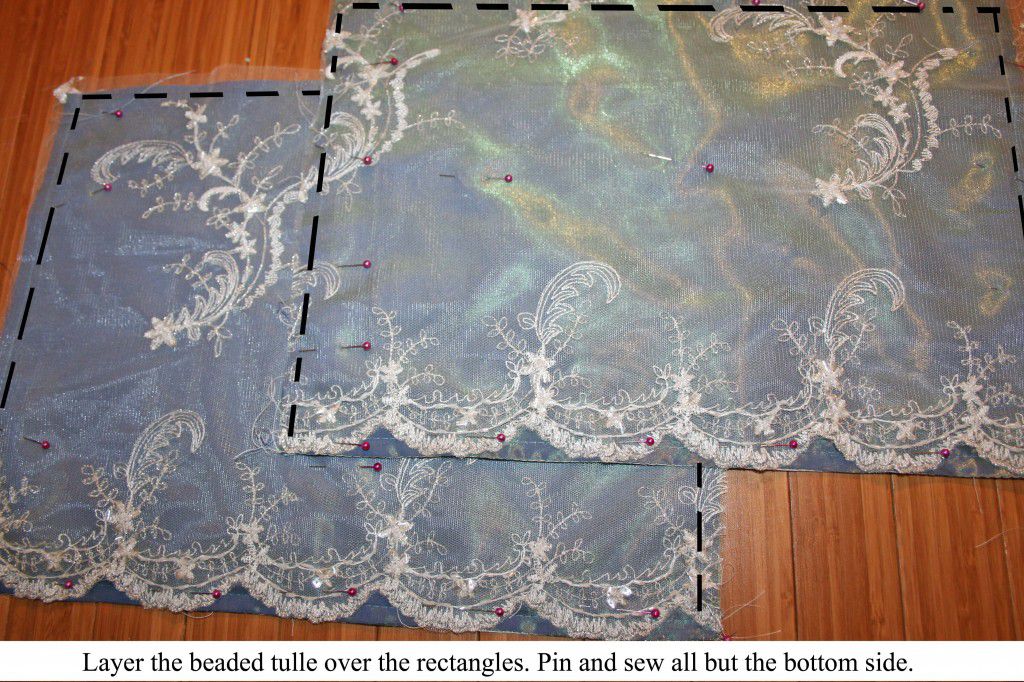
Step 5 - Layer the Beaded Tulle
Cut 2 rectangles from the beaded tulle using the muslin/pearlescent rectangle as a pattern. The beaded tulle rectangle is different measurement that the other rectangles because the scalloped edge will act as the hem.
Overlay on to the right side of the pearlescent/muslin rectangle. Pin and sew using a 1/4 inch seam. Because the tulle is beaded, you'll have to remove beads as they come in the way of the needle.
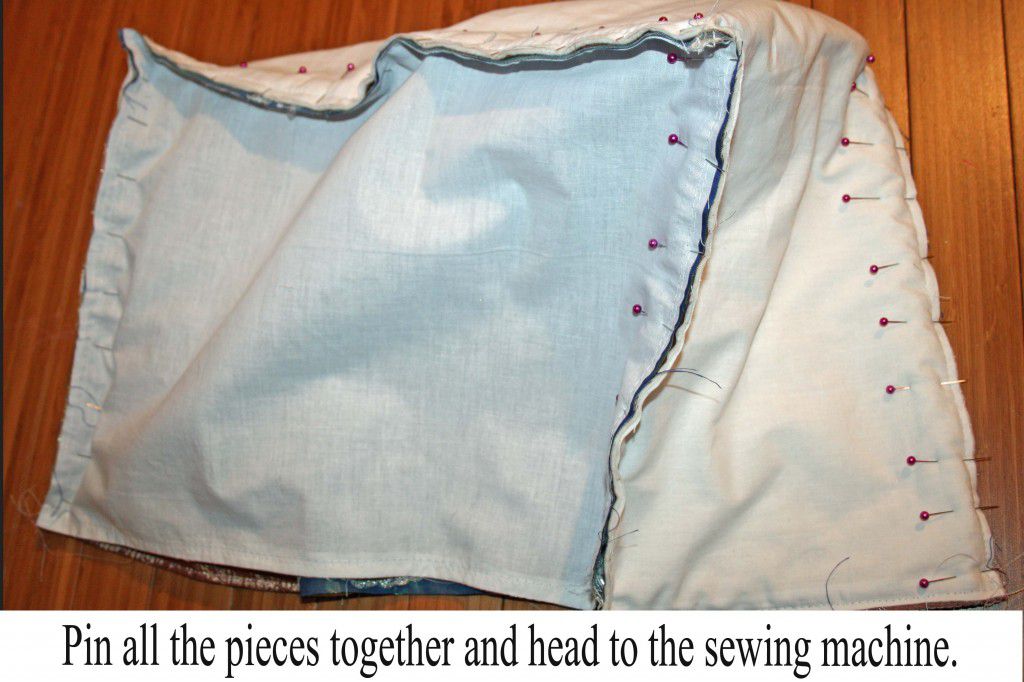
Step 6 - Putting it all together
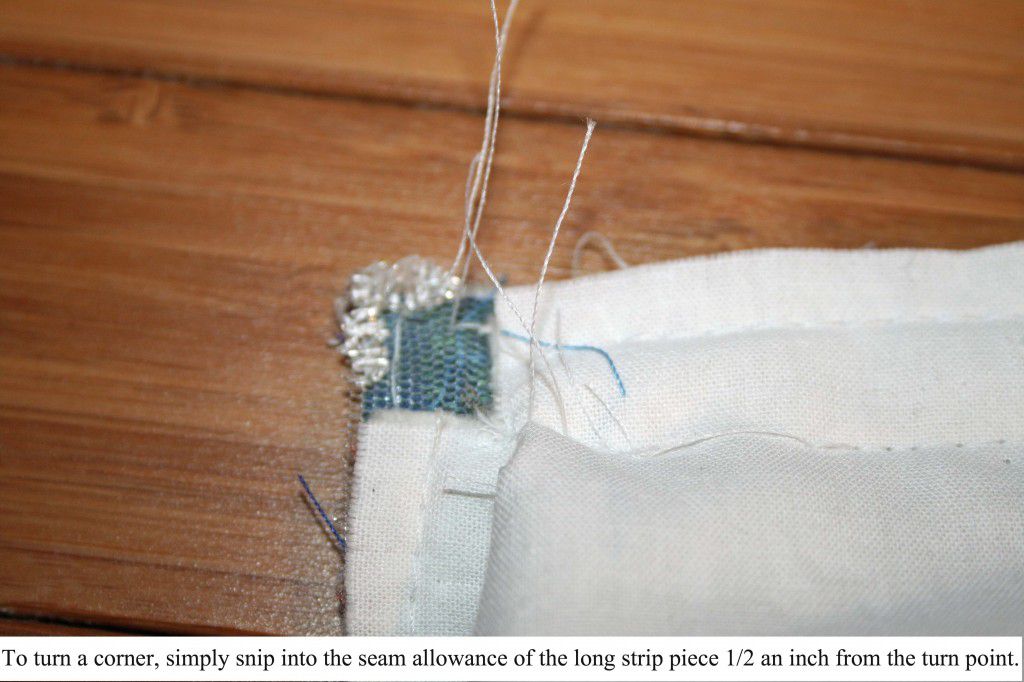
Put the cover back together as you did in step 2. To go around corners, snip into the seam allowance 1/2 an inch from the turning point.
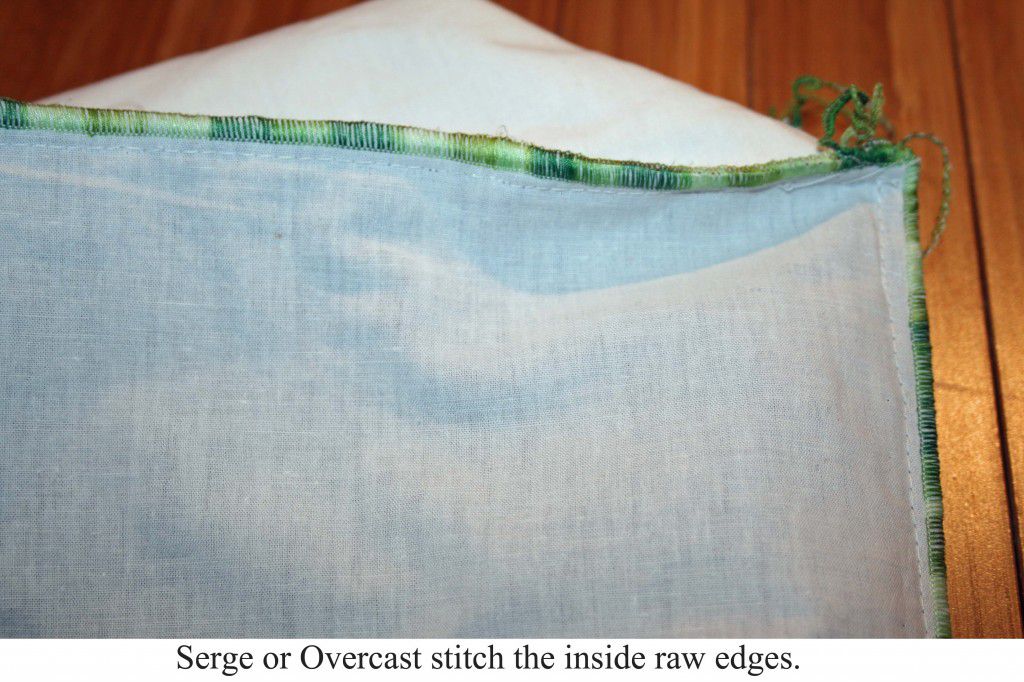
Step 7 - Finishing the Inside
Using either a serger or overcast stitch, finish the inside raw edge.
Viola! Brand new sewing machine cover. And a nice little piece of art for your sewing area.