
Let's make an adorable, fully-lined Christmas Stocking! It may seem early, but here at Sewing Parts Online, we love Christmas! We all know how quickly Christmas will be upon us. After watching this video, you can put a checkmark next to First Christmas Project - Done.
WHAT YOU NEED TO MAKE YOUR CHRISTMAS STOCKING
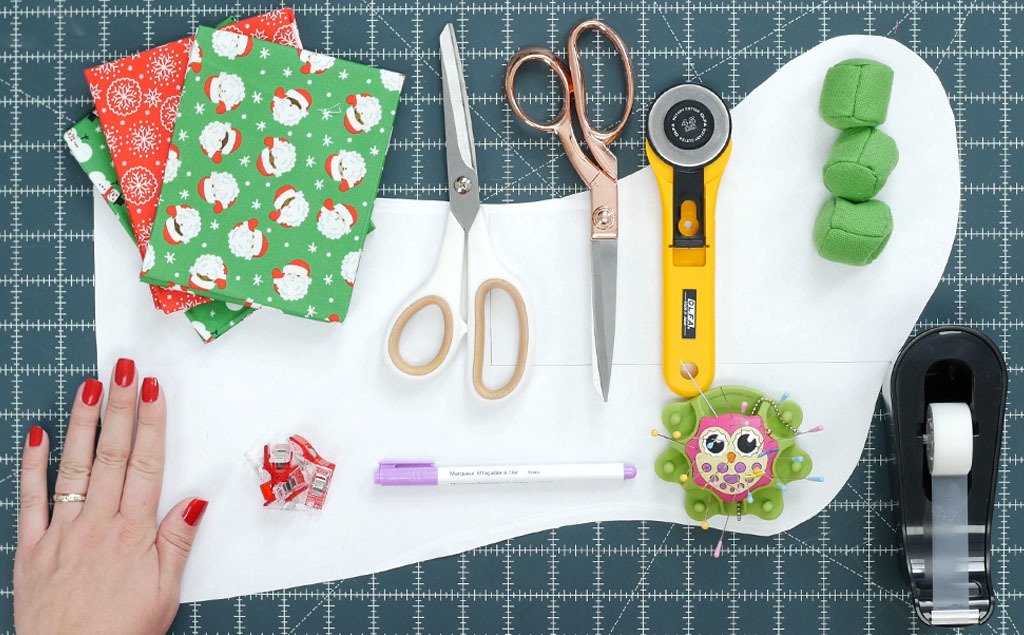
In order to begin, you will need to gather a few supplies. First, you need a pattern. You can either trace an old stocking or you can print this FREE Pattern. Next, you will also need to grab fabric, paper scissors, tape (if you print my pattern), scissors, rotary cutter and rotary mat (if you have one), iron, pressing mat/ironing board, marking tool, rulers, pins, and fabric clips.
PREPARING THE COMPONENTS OF YOUR STOCKING
First, if you decide to trace an old Christmas stocking, that is completely fine. Just make sure that you leave approximately 1/2" of additional fabric around the entire thing. That will account for the seam allowance.
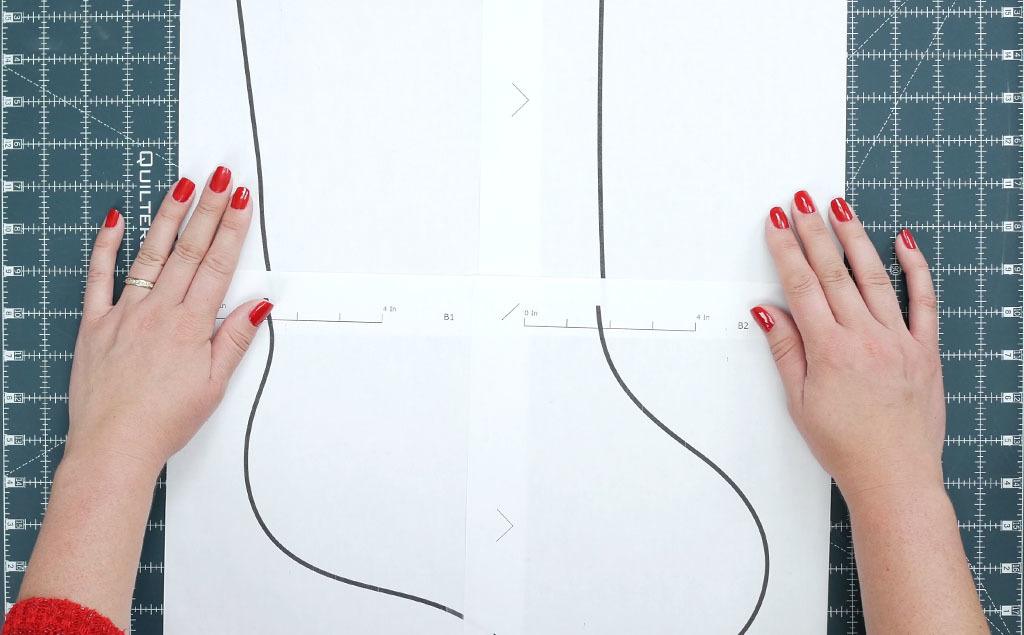
If you print my pattern, you will need to tape it together. It is made up of 4 pages, A1, A2, B1, and B2. The top two pages are A1 and A2. The bottom two pages are B1 and B2. Work with the top pages first. Place A2 over A1, aligning the pages where the diamond is formed in the middle. Make sure that the black lines also match up. Once they are matched up, tape. Repeat this for the bottom pages. After the bottom pages are taped, place the top of the bottom pages on the bottom of the top pages. Align the diamond and the black lines. Tape. Using your paper scissors, cut out your pattern.
CUTTING THE LINING OF YOUR STOCKING
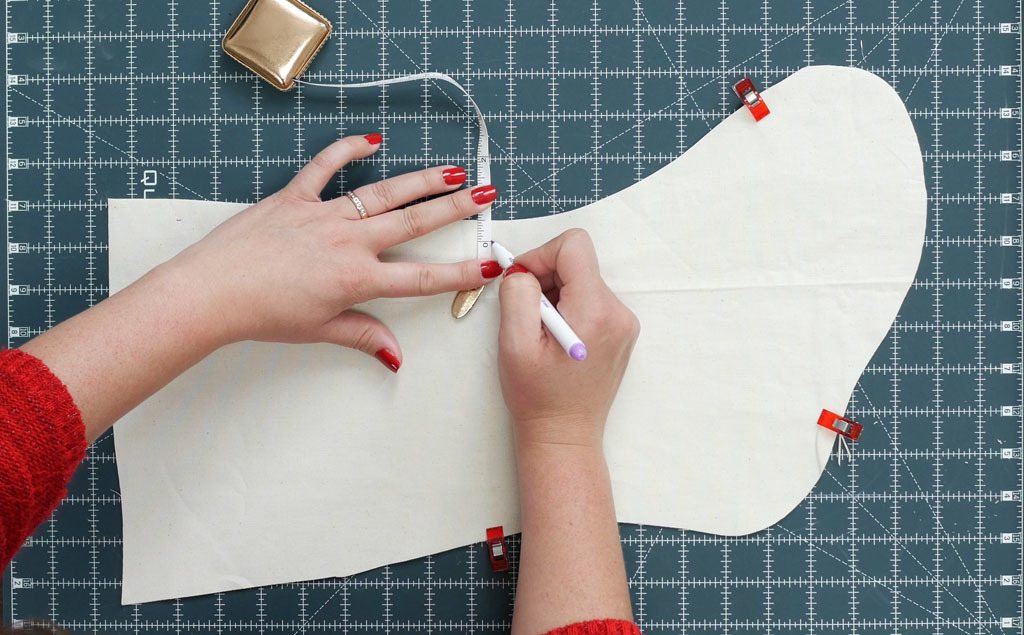
If you have a rotary mat and cutter available, I suggest using it for this part. Fold your lining fabric in half and place it on the rotary mat. Next, lay your pattern on top of the fabric. If needed, lay fabric weights to hold the pattern in place. Using your rotary cutter, cut out the lining pieces. Otherwise, you can use your fabric scissors to cut out the lining pieces. Remove the weights and the pattern. Place a few fabric clips around the stocking to hold it in place. Next, using an air erasable marker and ruler, mark 1/2" seam allowance around the entire stocking, excluding the top. Go back and connect all the dots. Lastly, pin the pieces together.
SEWING THE LINING OF YOUR STOCKING
Next, you can sew your lining pieces together. Set your machine to a straight stitch and set your stitch length to 2.40. Starting on what would be the left top of your stocking, sew all the way around, ending at what would be the right side of the top of the stocking. Make sure to backstitch at the beginning and at the end. Trim any excess seam allowance and clip the curves.

CUTTING THE OUTSIDE PIECES OF YOUR STOCKING
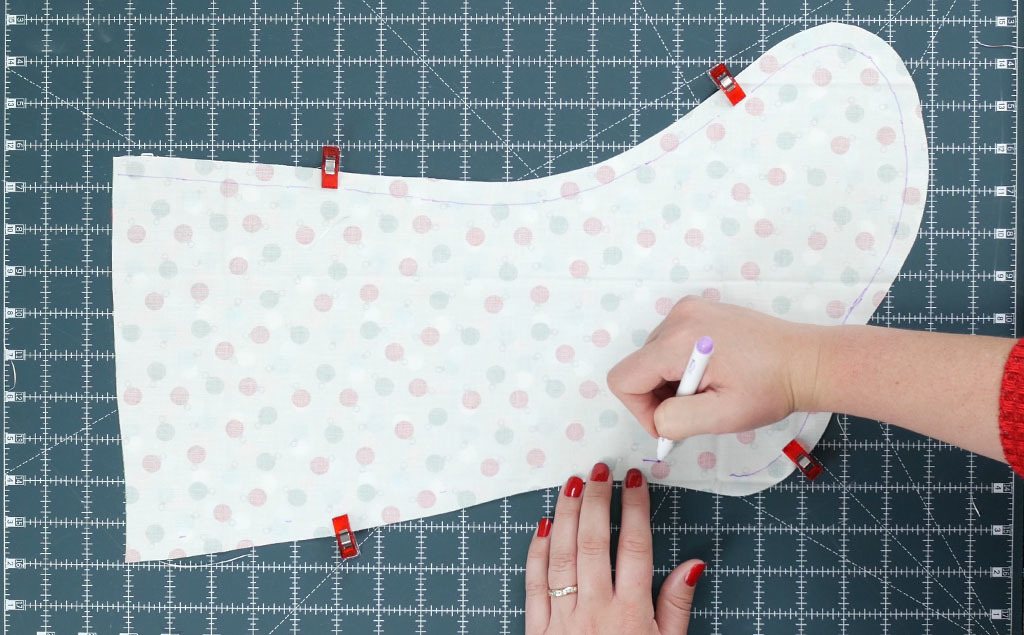
Now, for the outside of the stocking, place two pieces of fabric, right sides together. Once again, place the pattern on the top of the fabric. Cut out the outside pieces of your stocking. Repeat the process that you did for the lining, drawing marks for the 1/2" seam allowance. Go back and connect the dots. Pin the pieces together.
SEWING THE OUTSIDE OF YOUR STOCKING
Next, you need to sew the outside pieces of your Christmas stocking together. Repeat the process that you did for the lining. Starting on what would be the top of your stocking, sew all the way around, ending at what would be the other side of the top of the stocking. Make sure to backstitch at the beginning and at the end. Trim any excess seam allowance and clip the curves.
THE LOOP OF YOUR STOCKING
Let's make the loop, or the hanger, of your stocking. Cut out a piece of fabric 2 1/2" x 8". Lengthwise, fold the bottom 1/2". Press. Lengthwise, fold the top 1/2". Press. Next, lengthwise, fold in half and press. Pin it to hold. Topstitch around the entire loop. Pinch it in half and set it aside.

CUTTING THE BAND OF YOUR STOCKING
Before we can cut out the fabric for the band piece, we need to put the lining in the stocking. Leave the lining as is, but turn the outside of the stocking right side out. After you have turned it right side out, press the outside of the stocking.

Next, work the lining into the stocking. Align your seams and match up the raw edges of the fabric. Pin in place or secure with fabric clips. Lay your stocking flat on the table.

Measure across the top from the left to the right. Double that amount and then add an inch. That is the length of your band.
In order to cut the band piece, you also need to know the width. This is a preference. Let's say, you want a 2-inch wide band. You will double that amount and add an inch. It is doubled because it is going to be folded. The extra inch accounts for the seam allowance. Cut out your band piece.

SEWING THE BAND OF YOUR STOCKING
Lay your band piece- right side up, in front of you, horizontally. Bring the left side over to the right side. Mark your seam allowance with your air erasable marker, which would be 1/2". Pin. Sew. Cut any excess to eliminate bulk. Press open the seam. With your band piece in front of you, seam up, fold the fabric in half, forming a band, exposing the right side of the fabric. Align the seams and raw edges. Pin or use fabric clips to hold it in place.

ASSEMBLING THE PIECES OF YOUR CHRISTMAS STOCKING
Out of the steps of this project, this is where some get a little nervous. Don't worry. It really is easy. Grab your stocking, which you now have the lining already in it. At this point, the seams should be aligned and the raw edges are matching. Now, take your band piece and place the folded edge in the stocking and align the raw edges of the band with the raw edges of the stocking. Make sure to align the seam.

Work the band so that it is evenly spaced around the opening of the stocking. Pin or use fabric clips to secure. Grab your loop. On the left side of the stocking, carefully insert the loop between the band and the lining. Also, make sure that the folded end of the loop is inserted and the raw edges of the loop are lined up with the previous raw edges. Again, pin to secure.

Now you can take it to the sewing machine and sew 1/2" seam allowance around the entire top of the Christmas stocking.

CONCLUSION
After sewing, flip the band over to cover the "ugly" seam allowance. This will also expose your loop. Using your fingers, work the band to lay flat. After you have worked it flat, press your stocking. If you would like, you can hand stitch initials on your Christmas stocking. Otherwise, if your machine has an embroidery option, you could embroider a name on the stocking. Have fun with it!

Until next time, Happy Sewing, Everybody.


