
You found a beautiful vintage sewing machine at a yard sale or, maybe, your Grandma passed it on to you. You want so badly to use it, but the bobbin winder isn't working. Don't worry! In this video, I will show you how to disassemble the vintage bobbin winder, as well as put it back together. You'll be sewing on your beautiful machine before you know it.
Disclaimer
Just a quick disclaimer. I am not a technician; however, throughout the process of taking this apart, cleaning, and putting this bobbin winder back together, I did check in with our technician. He gave me the stamp of approval. Also, it's currently working, so there is something to be said for that, right? If I do happen to use a term incorrectly, please let me know. I understand that many people love to work on these vintage machines and have a vast amount of knowledge of them. If you'd like to share, that would be awesome!
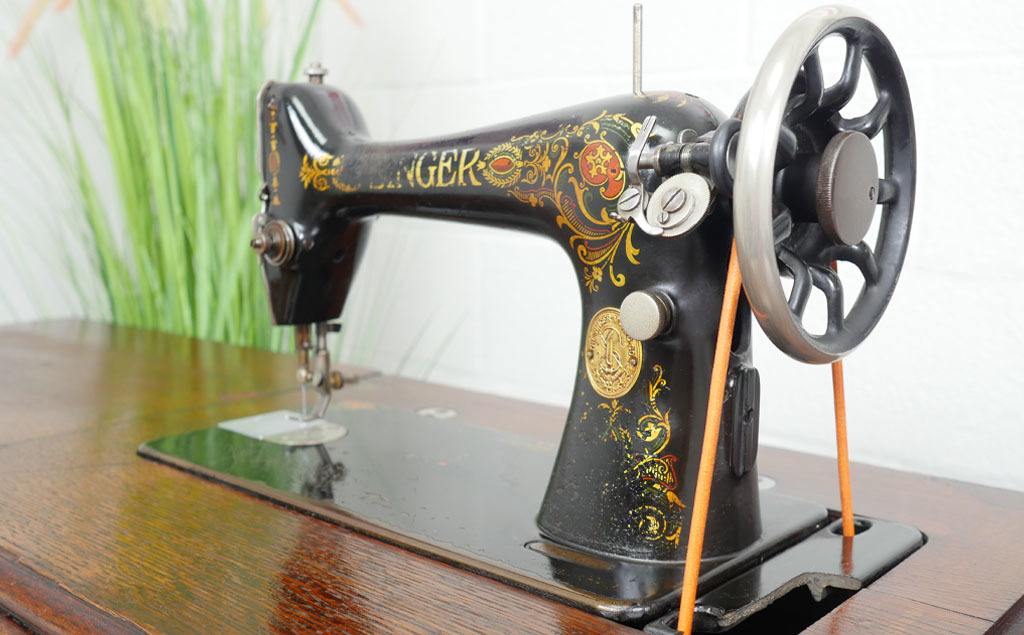
Also, this information is for a Singer 66-1 Red Eye treadle machine. Although this applies to this specific model and won't be identical for other vintage machines, the information will translate well and give you an idea of how to do this on other machines as well.
What You Need?
Although the little contraption on the right side of the machine may look a little strange, it's actually a pretty cool setup and simplistic in design. Don't be intimidated. You've got this!
All you need for this little mechanic adventure is a variety of flathead screwdrivers, 3/16" x 4", 1/4" x 5", and 3/16" x 1 1/2". I also used a pair of pliers (or a 9/32 wrench).
Removing from the Machine
Let's remove the bobbin winder from the machine. There is a screw at the top of the machine. Just unscrew that and carefully remove the bobbin winder unit.
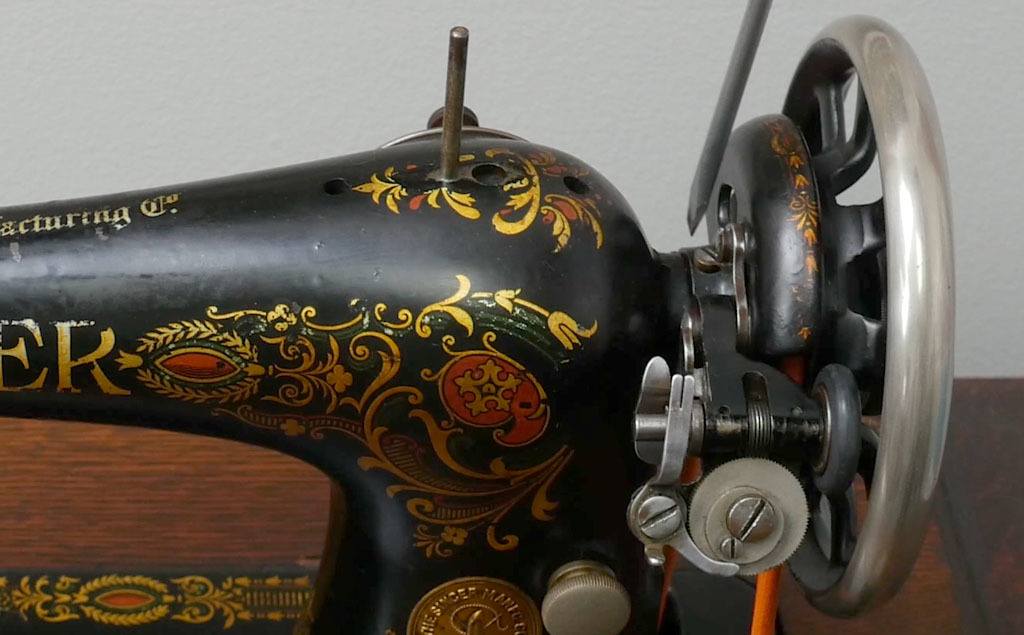
Depending on the position of the bracket, you may also need to loosen the bracket screw in order to get the top screw out. After you have removed the bobbin winder unit, make sure to take several pictures (from all different angles). This is a helpful reference when you are putting it back together.

Disassembling the Bobbin Winder
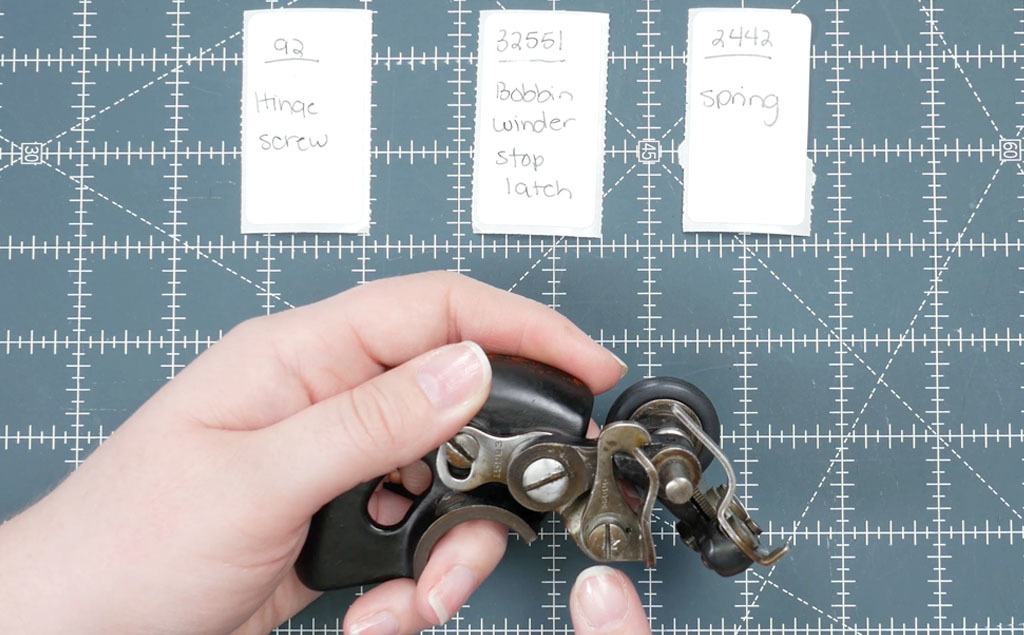
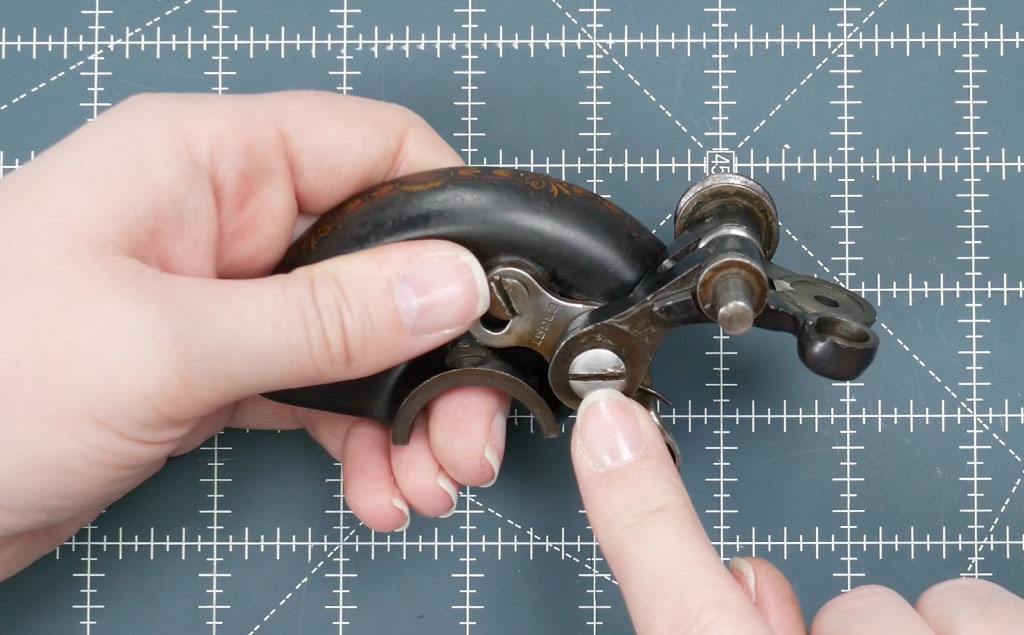
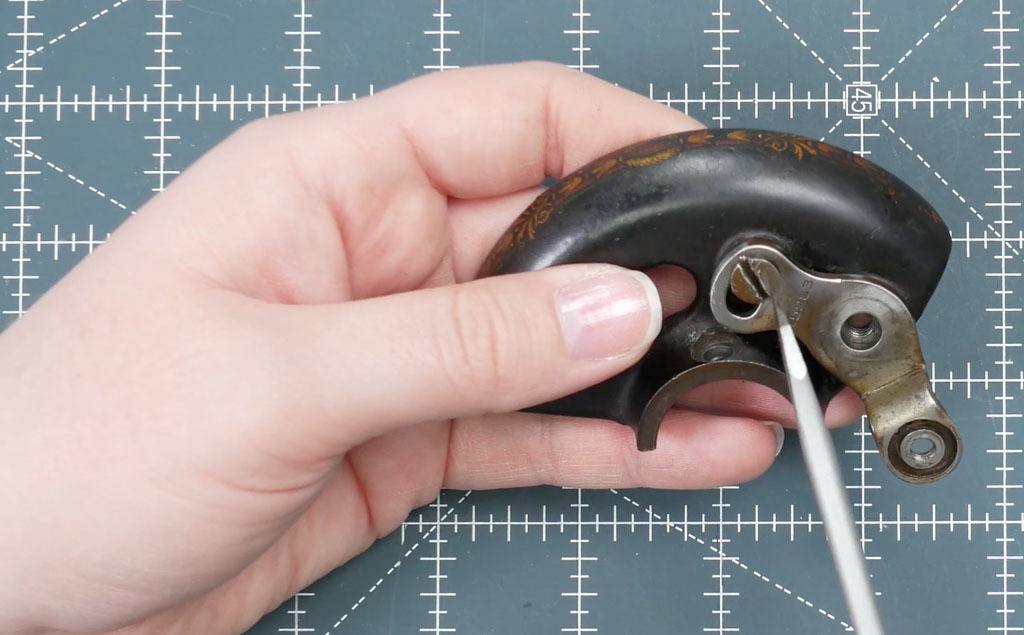
Bobbin Winder Stop Latch
The first thing that we are going to remove is the bobbin winder stop latch. This section is made up of three parts. The bobbin winder stop latch, the spring, and the hinge screw. Carefully, unscrew the hinge screw and remove the latch and spring.
Thread Guide
The next part to remove is the thread guide.
This section is also made up of three parts: the thread guide, the spring, and the screw. Loosen the screw and remove all 3 parts.
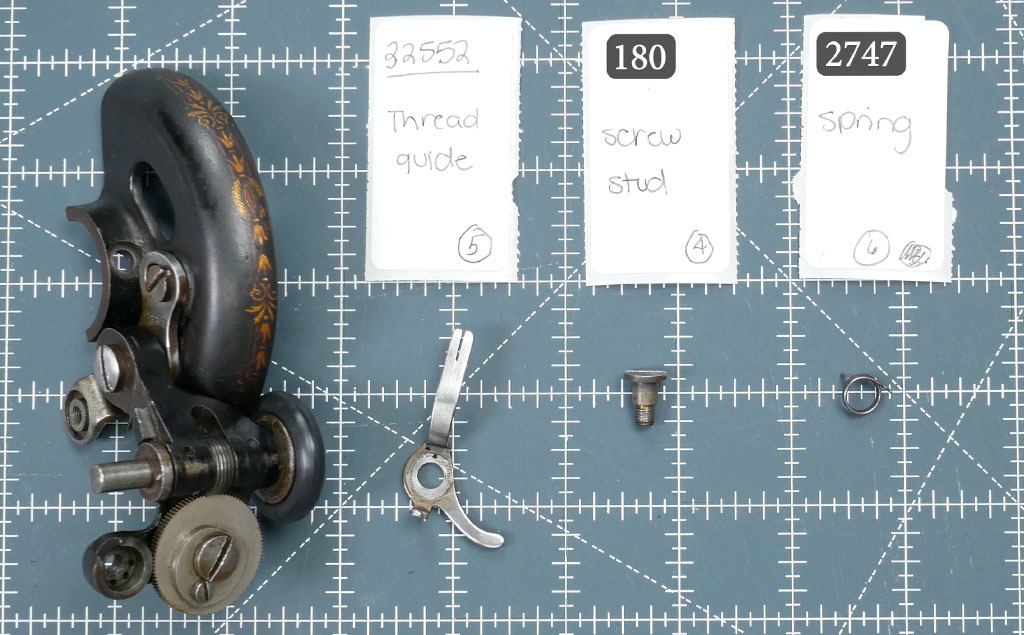
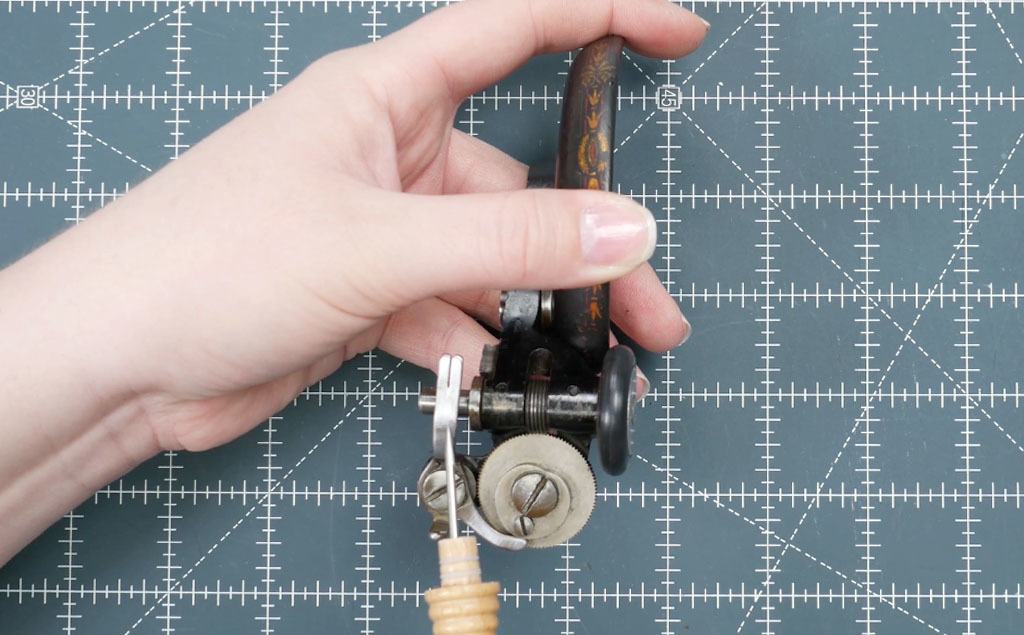
Cam Section
The next section is the cam section. This is made up of a few more parts. The largest piece is the worm wheel. That's the largest circular part that has teeth on it. Then, on top of that is the cam. The tiny screw is the cam screw, and the larger screw in the middle is the stud screw. Underneath, there is a nut. Once everything is removed, there is also a small friction washer.
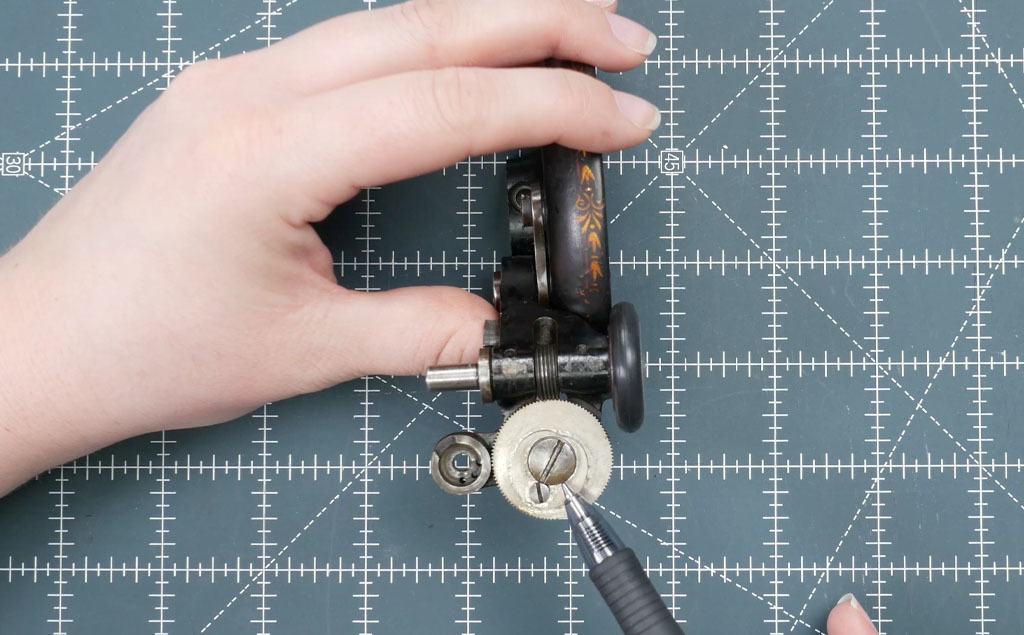
First, unscrew the small cam screw. Then, you need to remove the middle, larger stud screw. To remove it, place the 9/32 wrench on the nut, or use the wrench to hold it in place. Then, with your screwdriver, release the stud screw.

Tire and Bobbin Winder Frame
Over to the far right of the assembly, there is a rubber tire. You can remove that by simply popping it off.

Time to remove the bobbin winder frame. This is also going to be made up of three parts: the hinge screw, a spring, and the actual frame. You can disassemble the frame even further; however, we will not be doing that today.

Removing the Bracket
You're just about there! All you have to do now is remove the bracket screw and the bracket will come off!
Great job! Everything is apart! Now, you can clean the parts and put them back together.
Reassembling the Bobbin Winder
To reassemble the bobbin winder unit, you essentially just do the same thing, but backwards! There are some little idiosyncracies that are hard to show in pictures. In the video above, the reassembly process starts at timestamp 5:32. I will walk you through the whole process!
Adjusting the Bobbin Winder
You may find that after installation, the unit is too tight. When it's like this, the bobbin winder tire just slips. At timestamp 5:46, I show how to release the bracket screw and pivot the whole unit in order to correctly place it. If you have the screw closer to the bottom of the bracket, that is going to bring the unit tighter; whereas, if you have the bracket screw closer to the top of the bracket, that is going to make it looser.
Conclusion
These vintage machines are fun to work on. It is also very rewarding to get a 100+ year old machine up and running. If you are also needing to learn how to install a treadle belt, here is a video for that as well. Happy sewing, everybody!


