Being the only sewing family member means I’ve hemmed my share of pants. I don’t mind; I figure it makes up for my lack of cooking and cleaning skills. Really, hemming can be as easy or detailed as you want. When doing alterations properly, the goal is to match the original construction as much as possible so it looks like it was never altered. But if you or your family members don’t mind; to heck with it. Hem anyway you like. In this tutorial, we’ll be going over how to hem pants using a blindhem stitch. I use a serger to finish the raw edges, but if you don’t have a serger, you can use a conventional sewing machine by selecting a zig zag stitch or overcasting stitch. You can also turn the edges under twice. Whichever works for you is fine!

Supplies
Tailors Chalk
Serger (optional)
Blindhem Foot
Measuring tape
Pins
Iron
Sewing needle for fabric type and weight
Polyester thread
Step 1
First, while wearing the pants, have someone measure your inseam from the crotch to where you want the hem to fall. Some people like a higher hem, some higher. For instance, I’m hemming my mom’s work pants. Her inseam is 28 inches when we take into account her work shoes. For instance, if you wear platform wedges, your inseam will be longer than someone who wears flats.
Step 2 Now, take the pants off and mark the inseam measurement with tailors chalk or a pin.


NOTE: You don’t have to hem pants using the inseam. Since I usually do hem-a-thons, I prefer to use the inseam. However, you can also simply turn the hem up and pin while the person is wearing them. Want to save even more time/ Put the pants on inside out and pin. That way you won’t have to switch the pins to the inside, thus one less measuring step.
Step 3 Mark your finished hem line. I like to measure from the bottom of the pants up. So, say a 28 inch inseam means I have to take 3 1/2 inches off.


Step 4
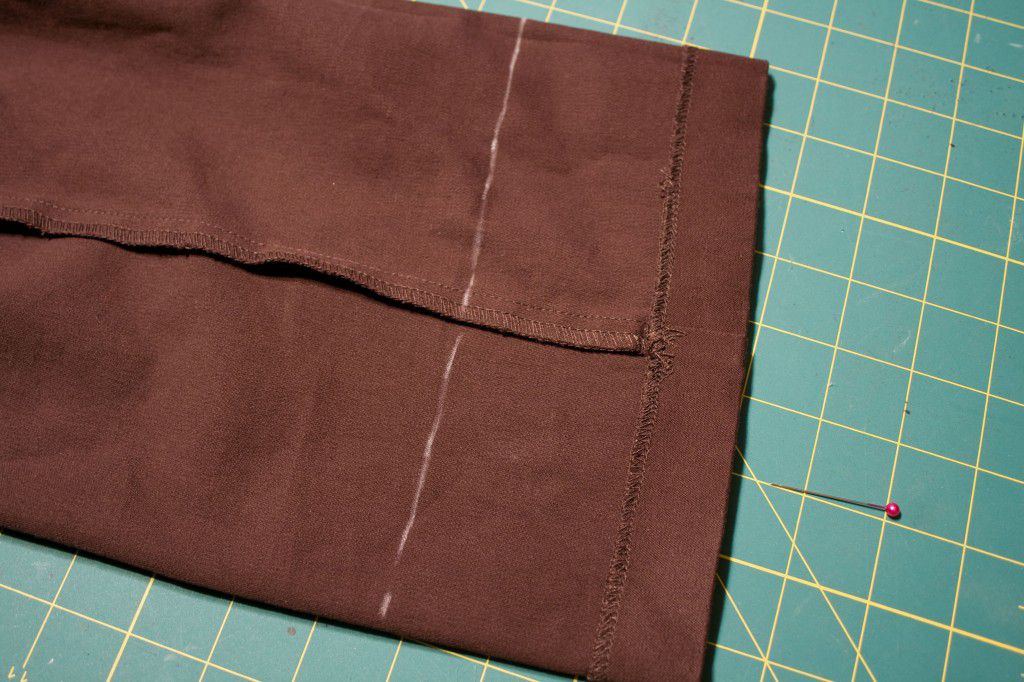
Draw another line 1 1/4 inches below the new hem line. This will be your 'cut' line. I say 1 1/4 inches because I like to give myself 1/4 inch to trim off when I serge. If you are using a zig zag or overcast, make your cut line 1 inch below the new hem line. If you plan to turn your raw edges under instead of 'finishing' them, simply turn the raw edge under 1/4 of an inch.

Step 5
Cut along the cut line.
Step 6
Either serge, zig zag, overcast, or turn under the raw edges.

Step 7
Sew a machine basting stitch along the new finished hem line. The basting stitch acts are a guide when ironing. Turn your tension down to 1 to make removing the basting stitch easier.

Step 8
Working on the inside of the pants, turn the hem up along the basting stitch and press with an iron. Use a press cloth for delicate material.

Step 9
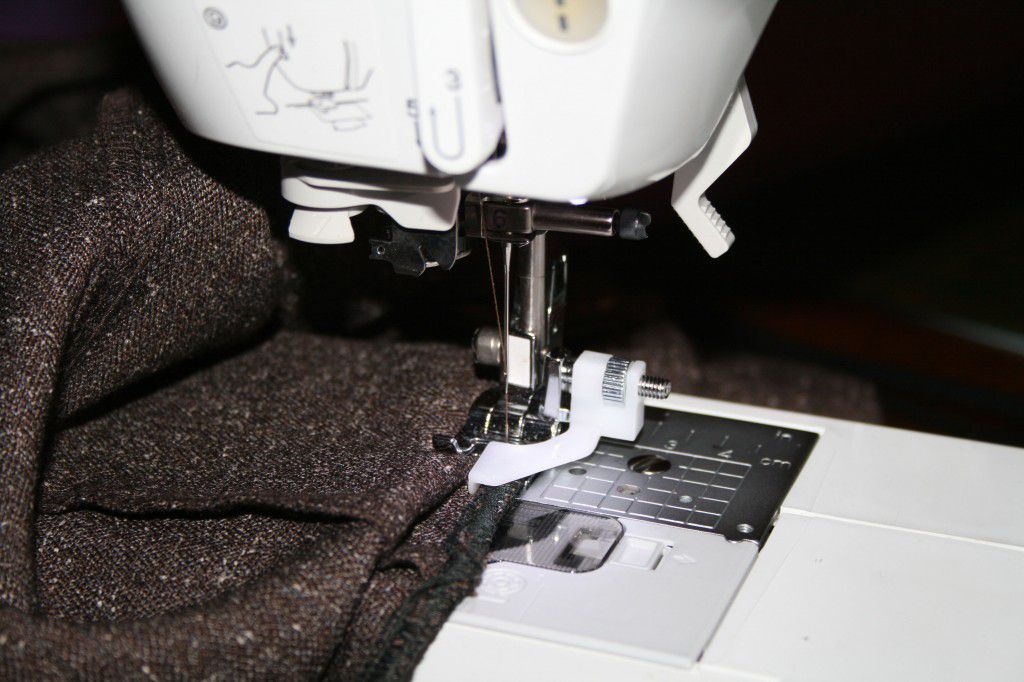
Now, time to take your pants to the machine! Install your Blindhem Foot. Fold the hem back on itself so that the stitches will be along the finished edge.

The actual pant leg will be folded into the mix. When your blindhem stitch goes to 'nip' the fabric, it only grabs a tiny bit of the pant fabric.
Step 10
Try to keep the 'fold' consistent as you blindhem stitch around the pant leg.
Step 11
Once you have finished both pant legs, turn the pants right sides out and use your hands to flatten out the hem. The hem should only be visible if examine close up.

TIP: In a time crunch and without matching thread? Do you have any monofilament thread? Use 'clear' monofilament thread for light colored fabric and 'smoky' monofilament thread for darker colors.


