

You can sew this "In The Woods" Deer Quilt with our free step-by-step tutorial!
By using one In the Woods Fabric Panel, you can sew a rustic wall hanging or throw quilt for the nature enthusiast in your life. To make the exact quilt featured in this tutorial (approximately 50" x 65"), you will need 1 yard of Whistler Studios, Forest Antlers Fabric (Sold out, we suggest using one of the following prints as it's replacement Brown Fabric or Outdoorsmen Fabric), 3 yards of (we used black fabric, batting, and cotton thread. Use your black fabric to create your quilt binding.
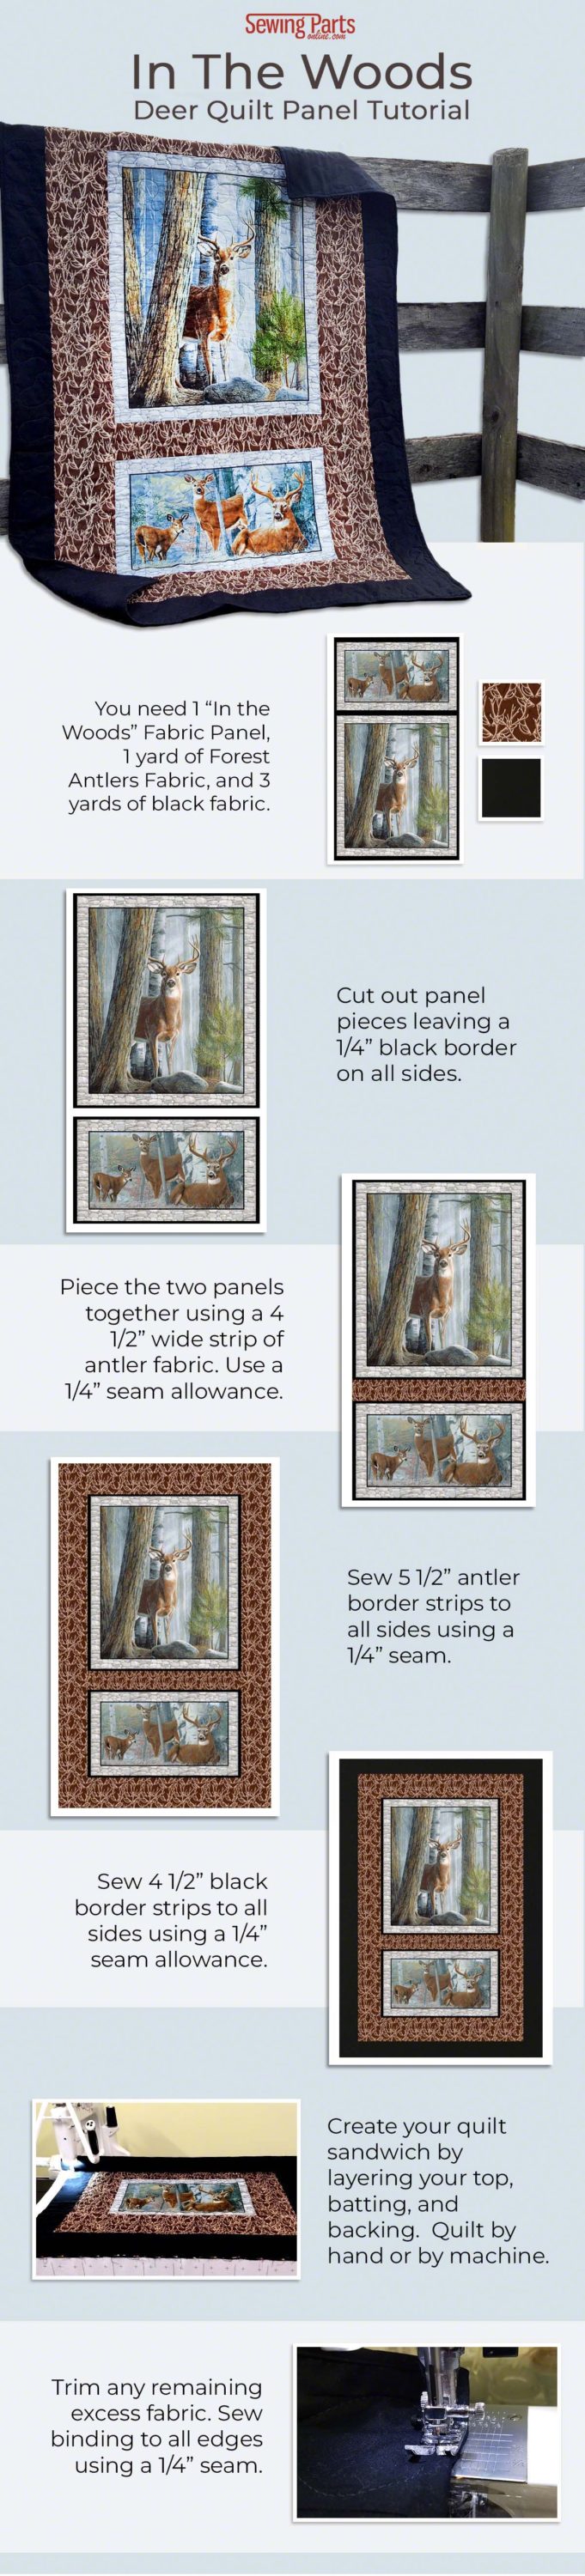
Supplies: In addition to your standard sewing supplies, you will need one In the Woods Fabric Panel, 1 yard of Whistler Studios, Forest Antlers Fabric (Sold out, we suggest using one of the following prints as it's replacement Brown Fabric or Outdoorsmen Fabric), 3 yards of (we used black fabric, batting, and cotton thread. Use your black fabric to create your quilt binding.
Step 1: Cut out panel pieces leaving a 1/4” black border on all sides. Piece the two panels together using a 4 1/2” wide strip of antler fabric. Use a 1/4” seam allowance.
Step 2: Sew 5 1/2” antler border strips to all sides using a 1/4” seam. Sew 4 1/2” black border strips to all sides using a 1/4” seam.
Step 3: Create your quilt sandwich by layering your top, batting, and backing. Quilt by hand or by machine.
Step 4: Trim any remaining excess fabric. Add binding along all raw edges using a 1/4” seam.
We're so excited to see what you make! Be sure to tag Sewing Parts Online in a picture of your latest sewing projects!
Be sure to check out our full collection of fabric panels. We're always adding new prints!


