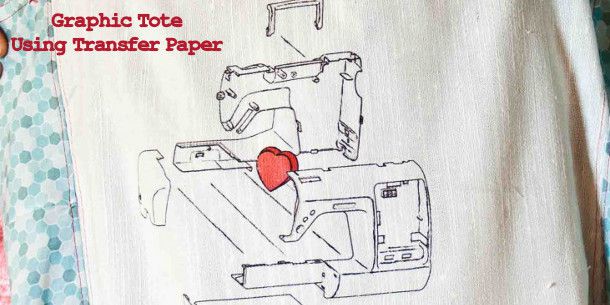
If you've never used Transfer Artist Paper you are missing out on some serious fun! TAP (Transfer Artist Paper) is iron-on paper compatible with multiple surfaces. Not only can it be used on fabric, but it can also be used on glass and ceramic! You can also layer images to create awesome collages.

I wanted to make this tote because our webdesigner, Steve, made this awesome sewing machine graphic. Talk about talent! I felt it was definitely needed to be on my new fabric shopping bag. Next, it's going on a T-shirt!
The fastest way to complete this project is with 4 thread overlock on a serger. If you don't have a serger, no problem! Finish the edges with a zig zag or over cast stitch. If you want to get really fancy, put some cute binding around the raw edges after you have completed steps 1- 3.
Tip: Don't know what image to use? You are more than welcome to use our image (for personal use only), but if that's not your style, how about a favorite photo? This project is great for all those awesome pictures of family and friends!
Supplies
Cut 2 14 x 17 rectangles (A)
8 x 48 strips (B)
2 3 x 24 strips (C)

Universal Needle
Scissors

Iron
Printer (not laser)
Image to be transfered

Step 1
I originally had 2 grey rectangles, but the transfer didn't show up as brightly as I wanted, so I used a white rectangle instead. Sew the first rectangle (A) to strip B. When you get to the corner, snip into strip B about 1/4 inch from the corner. Pivot strip B and continue to sew until you get the next corner and repeat.


Step 2
Print your graphic onto the white side of the transfer paper. There are two sides of the paper; a white side and a grey side. You want your image to print on the white side of the paper. If your printer is a straight through, then place the paper in white side up. If your printer in a bottom loading, place the paper white side down. Trim around the design and position on the white rectangle (A) to your liking.

Flip the paper over and iron down with a hot iron. Do not use the steam setting. Make sure to keep the iron moving. Spend a good minute ironing in the design. When the design has completely transferred, the paper will come up very easily and smoothly.
 TIP: If you are making your own design, make sure you are printing the reverse image. Otherwise, when the image is transferred, everything will be backwards.
Step 3
Sew the rectangle with the grahic on to strip B as before.

Step 4
Finish the top raw edge and turn under 1 1/2 inches and sew.
Step 5
To make the straps, fold each strip C in half, right sides together. Then Turn it inside out and iron. If you don't want to make your own straps, any secure trim or binding will work fine.
Step 6
Attach one end of one of the strips to each side of the first rectangle. Repeat on the other rectangle. Secure the ends down by criss crossing the stitches and reinforcing.
 Wear your new tote with pride! We would love to see any projects you made using Transfer Artist Paper! Please upload your photos in the comment section below and share your work with the sewing community!


